Skip to main contentThis guide walks you through integrating your SketricGen agent workflow with your Framer website using the chat widget embed code.
Step 1: Create Your SketricGen Account
To get started with the integration, sign in to your SketricGen account. If you don’t have an account yet, you can create one for free.
Once you’re logged in, begin setting up your agent workflow by uploading your data sources. These can include files, text snippets, websites, or Q&A pairs, which will serve as the knowledge base for your agent workflow.
If you need assistance with setting up a working SketricGen agent workflow, refer to our step-by-step guide for creating and deploying your agent workflow.
Step 2: Copy the SketricGen Agent Embed Code
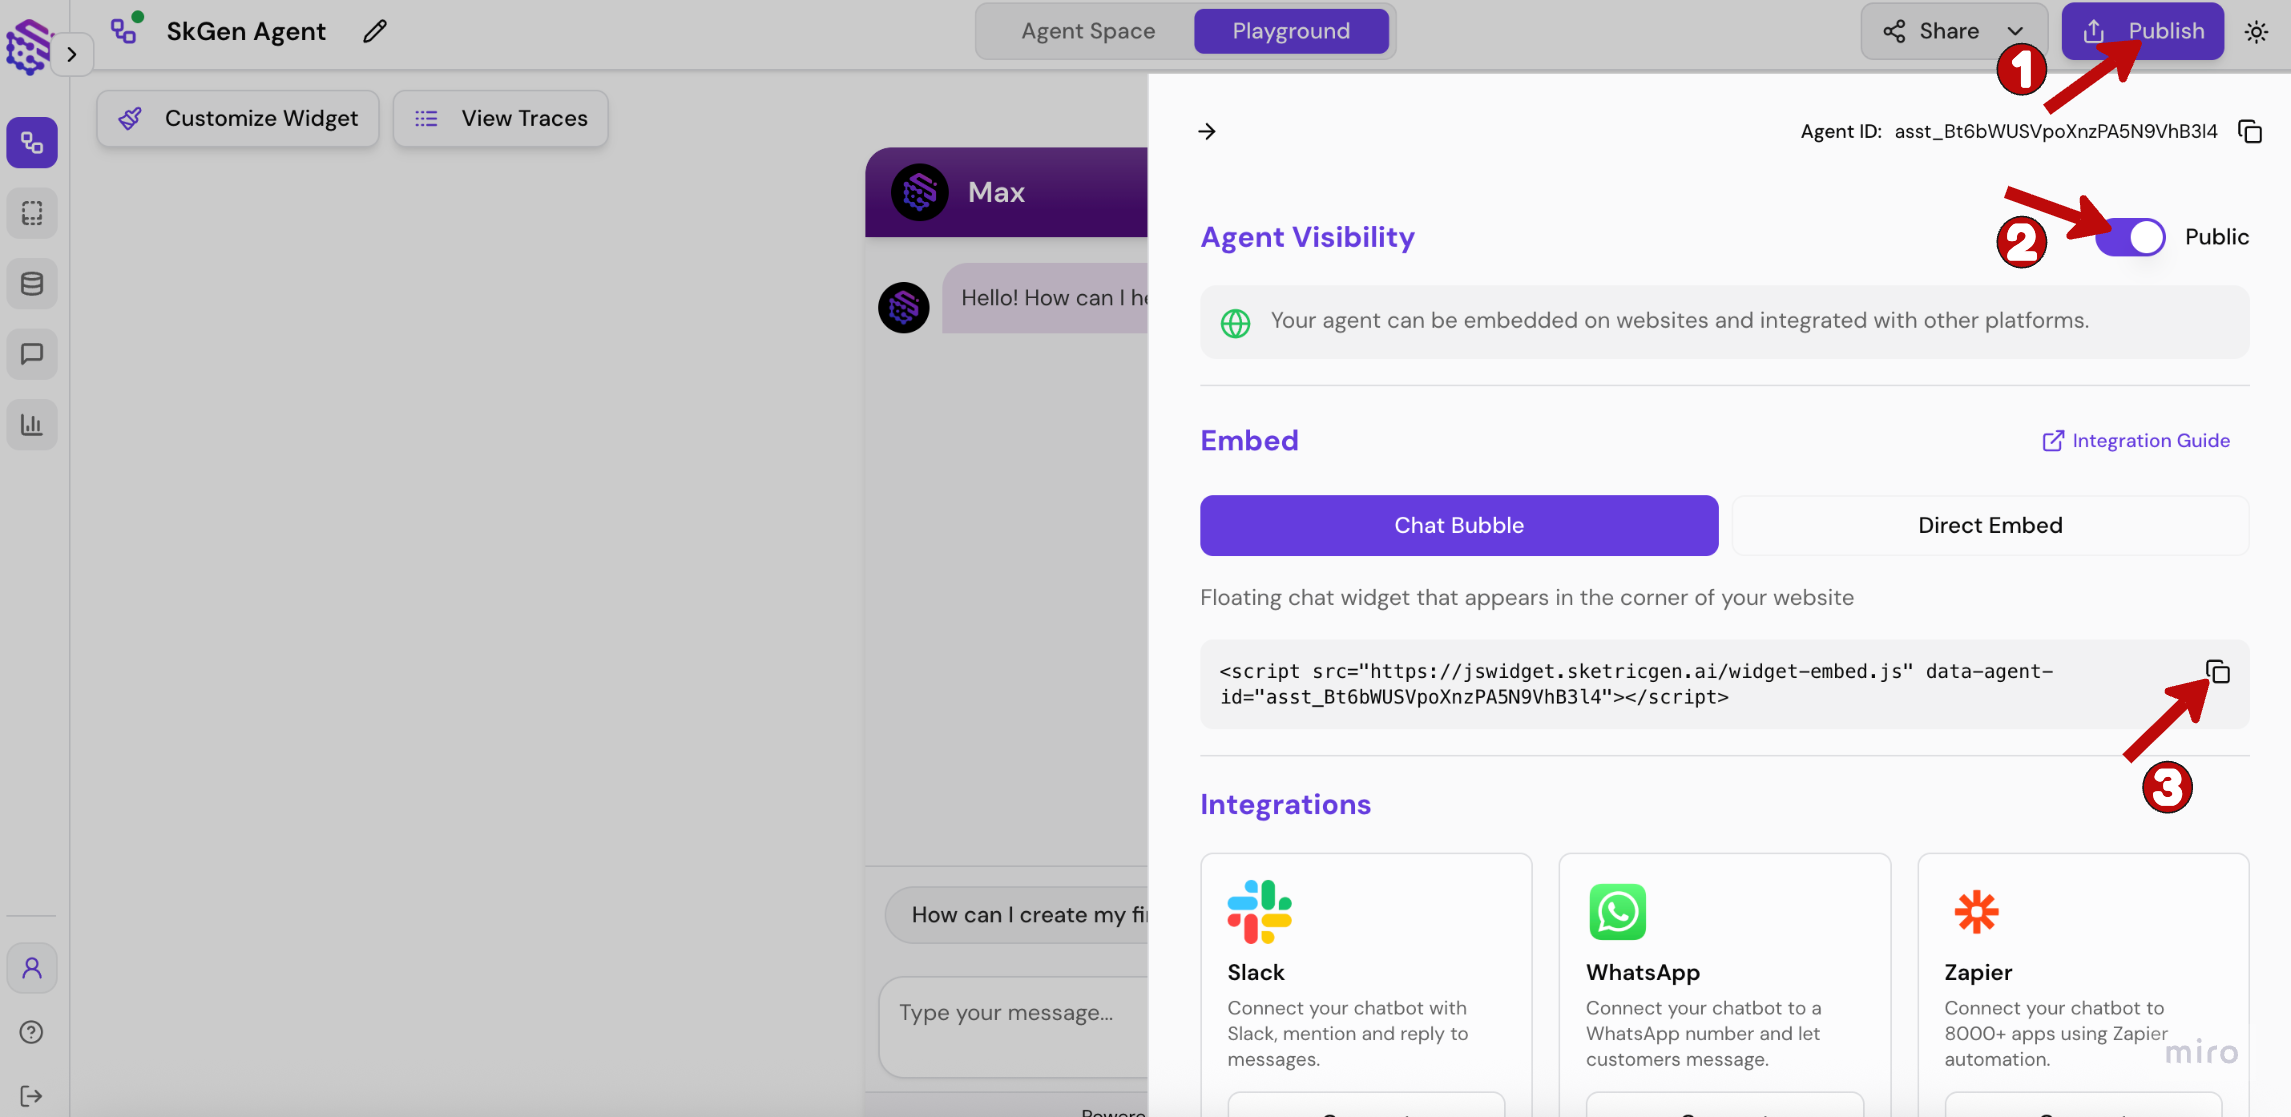
After configuring your agent workflow, go to your agent workflow’s dashboard and click on Publish to copy the embed code.
Important: Ensure your agent workflow is set to Public in order to add it to your Framer website.

Step 3: Add Code to Your Framer Site
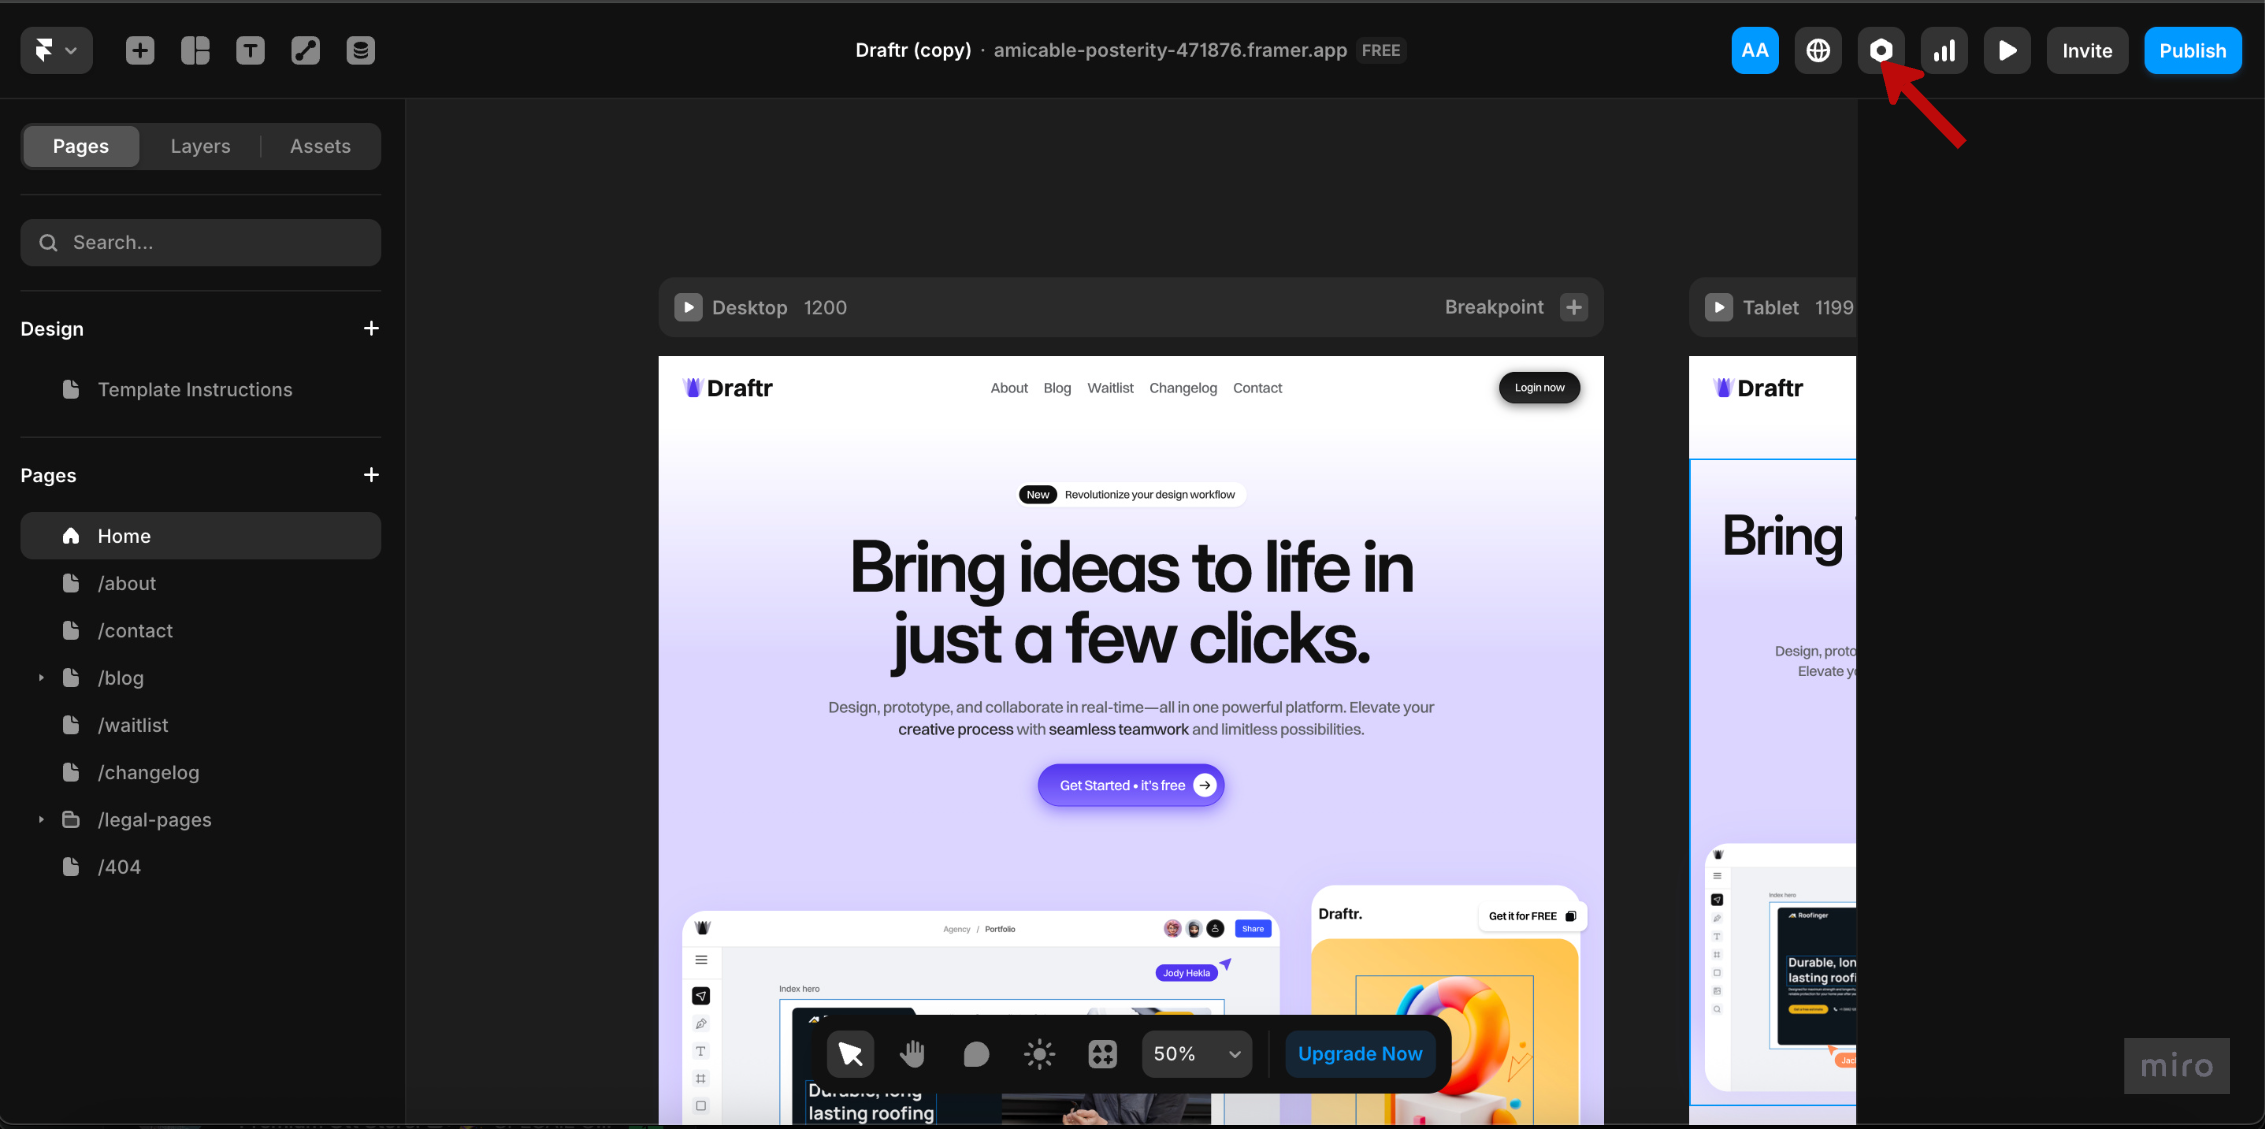
Access Site Settings
- Log in to your Framer account and open the site where you want the SketricGen Chat Widget to appear
- Navigate to Site Settings

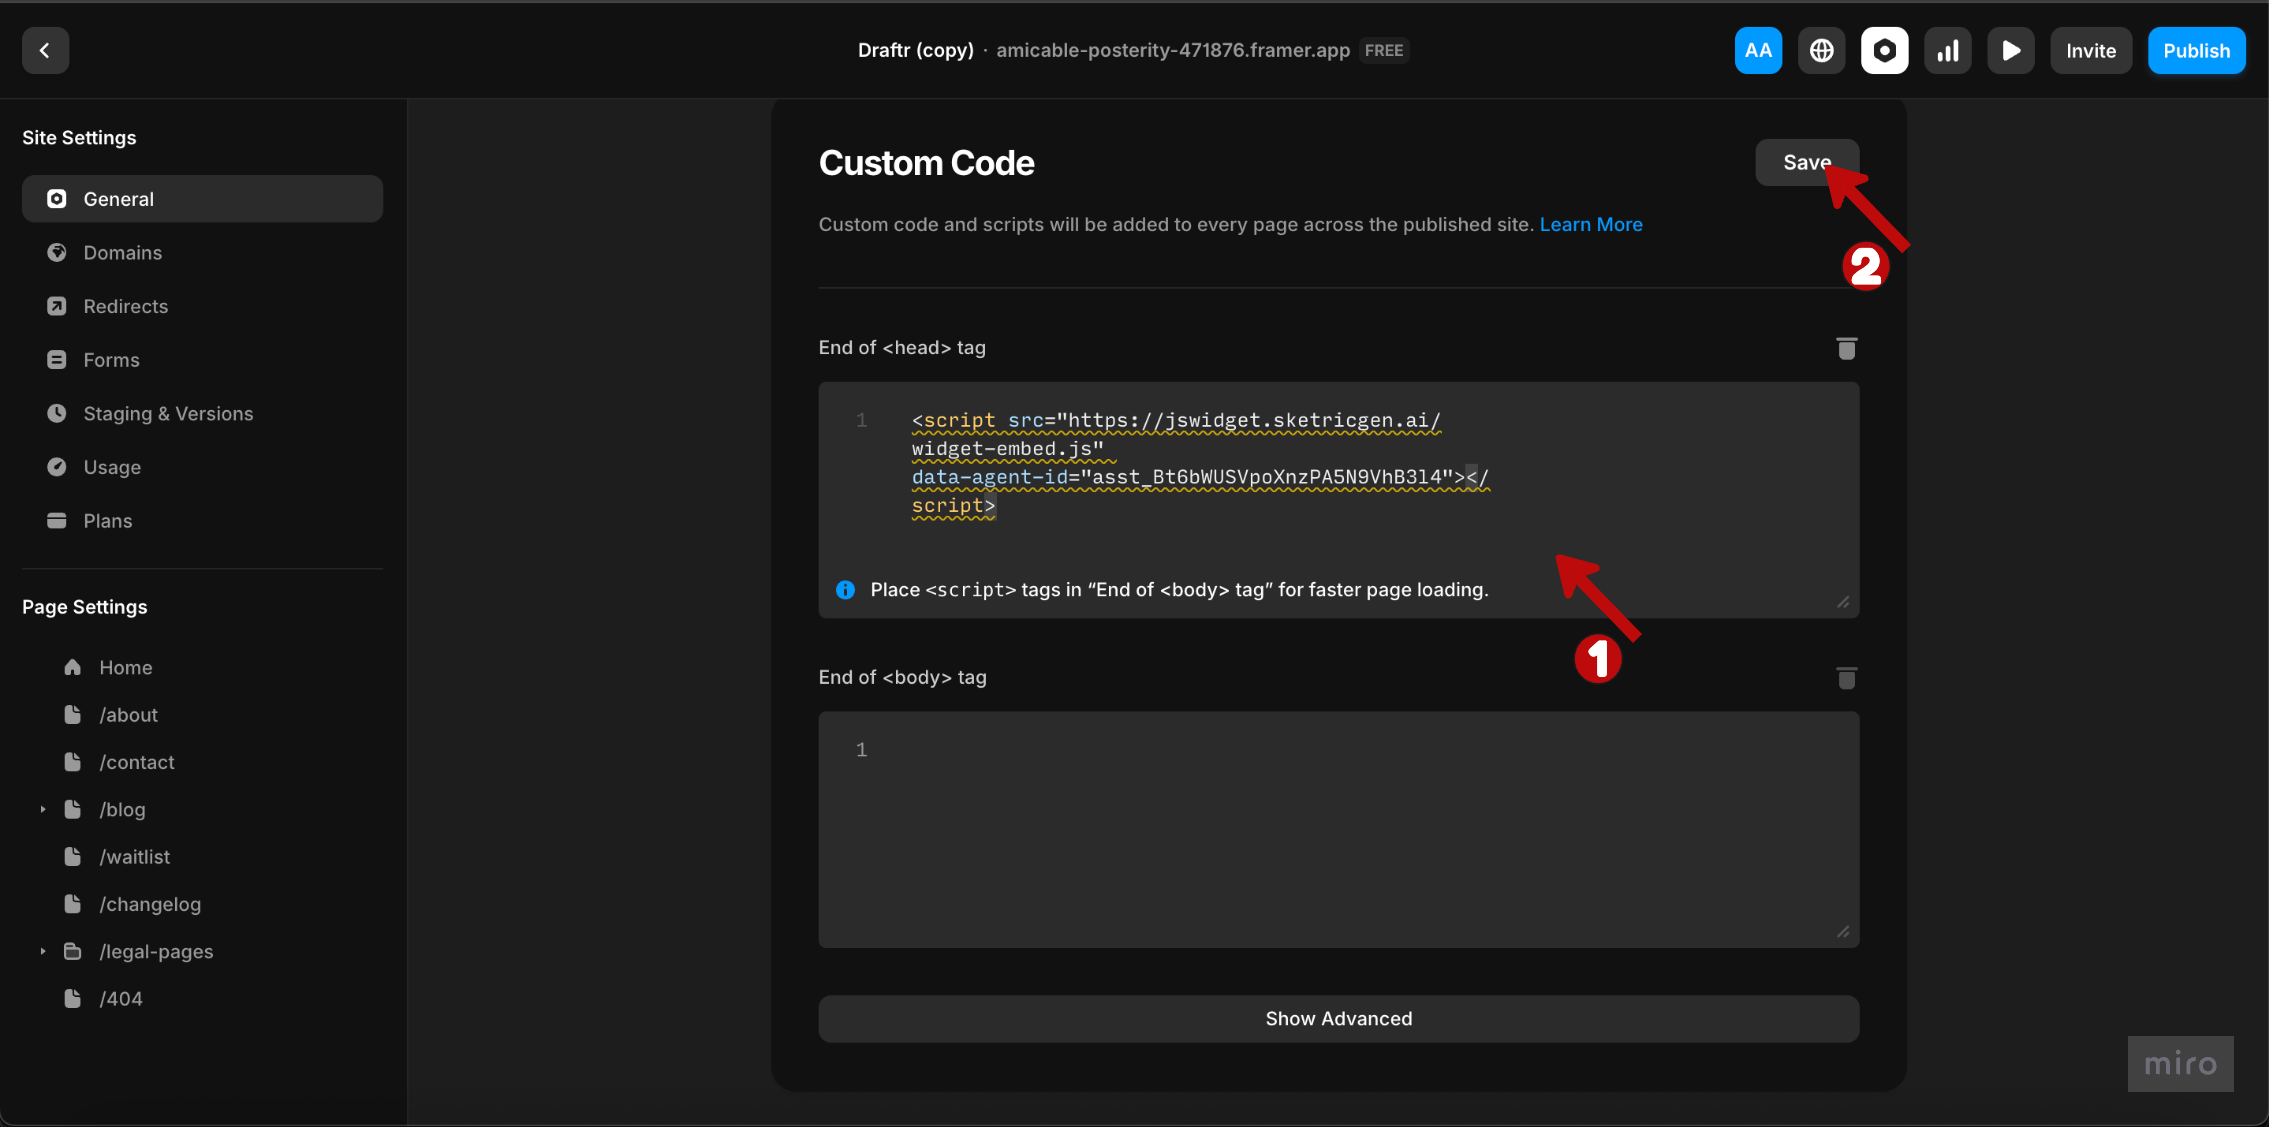
Insert Custom Code
- Go to the Custom Code section in site settings
- Paste the embed code you copied in Step 2
- Click Save

Publish Your Changes
Publish your site to make the agent workflow widget live and visible to visitors.
Step 4: Test Your Integration
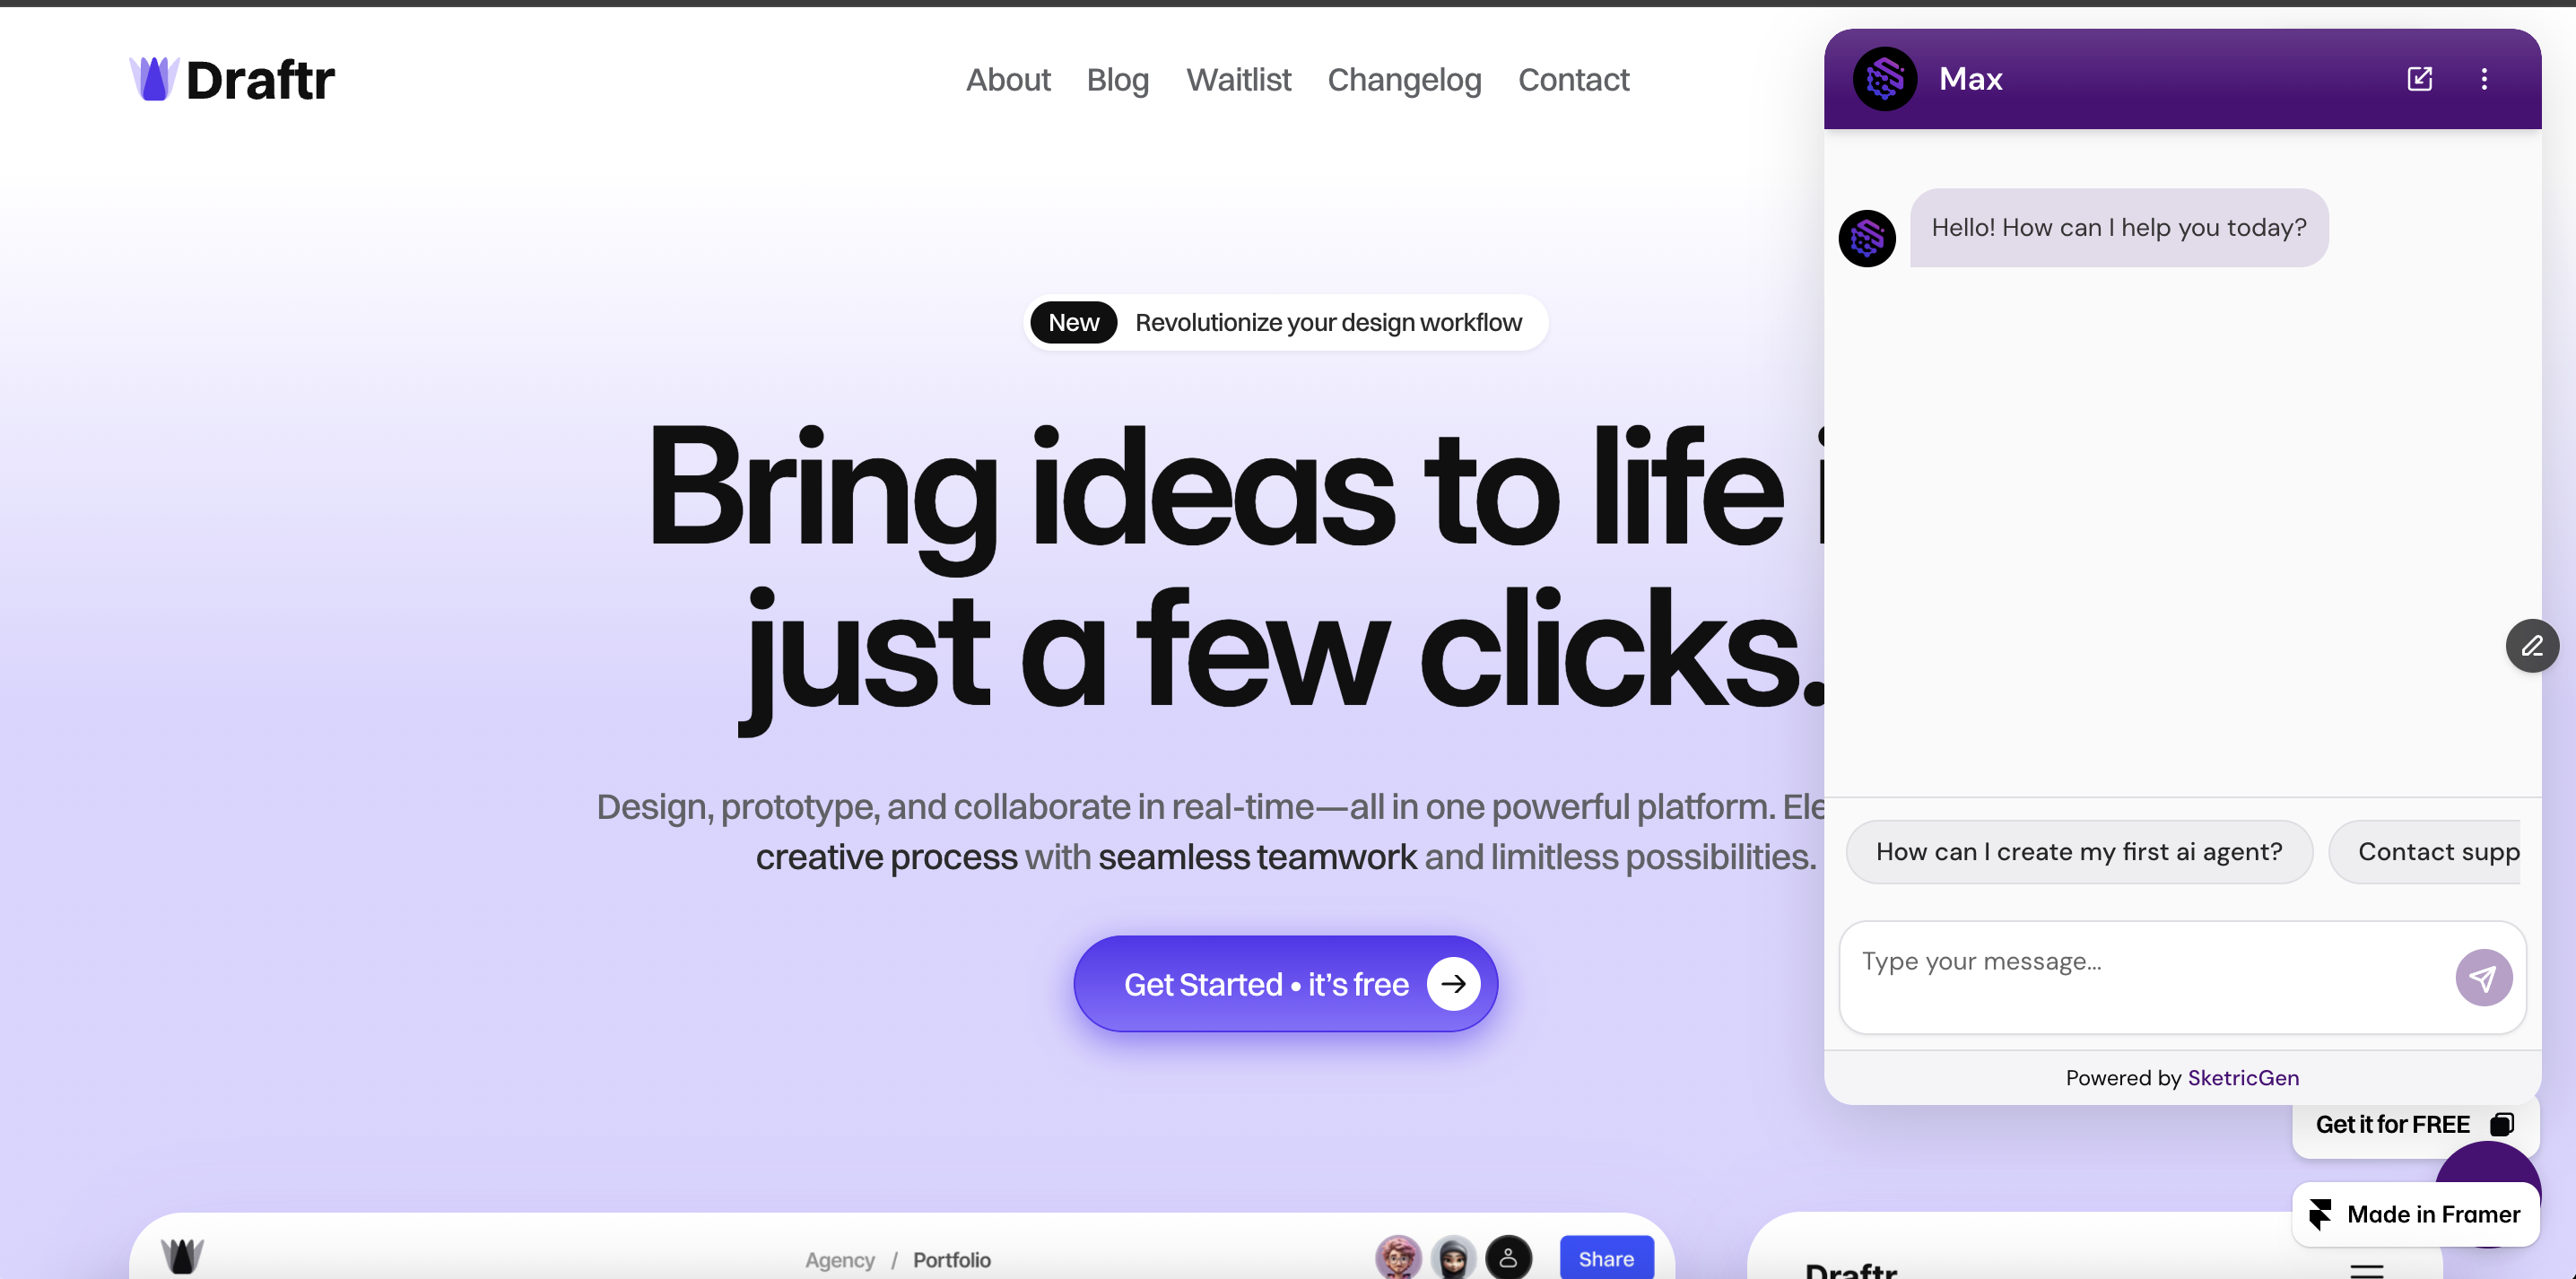
After publishing, visit your Framer website to test the chat widget functionality.
 Congratulations! You have successfully integrated the SketricGen Chat Widget. Your visitors can now directly chat with your agent and get tailored responses.


