Step 1: Sign Into SketricGen and Set Up Your workflow
To get started with the integration, sign in to your SketricGen account. If you don’t have an account yet, you can create one for free. Once you’re logged in, begin setting up your workflow by uploading your data sources. These can include files, text snippets, websites, or Q&A pairs, which will serve as the knowledge base for your workflow. If you need assistance with setting up a working SketricGen workflow, refer to the step-by-step guide for creating and deploying your workflow.Step 2: Install SketricGen Chat Widget on Your WordPress Website
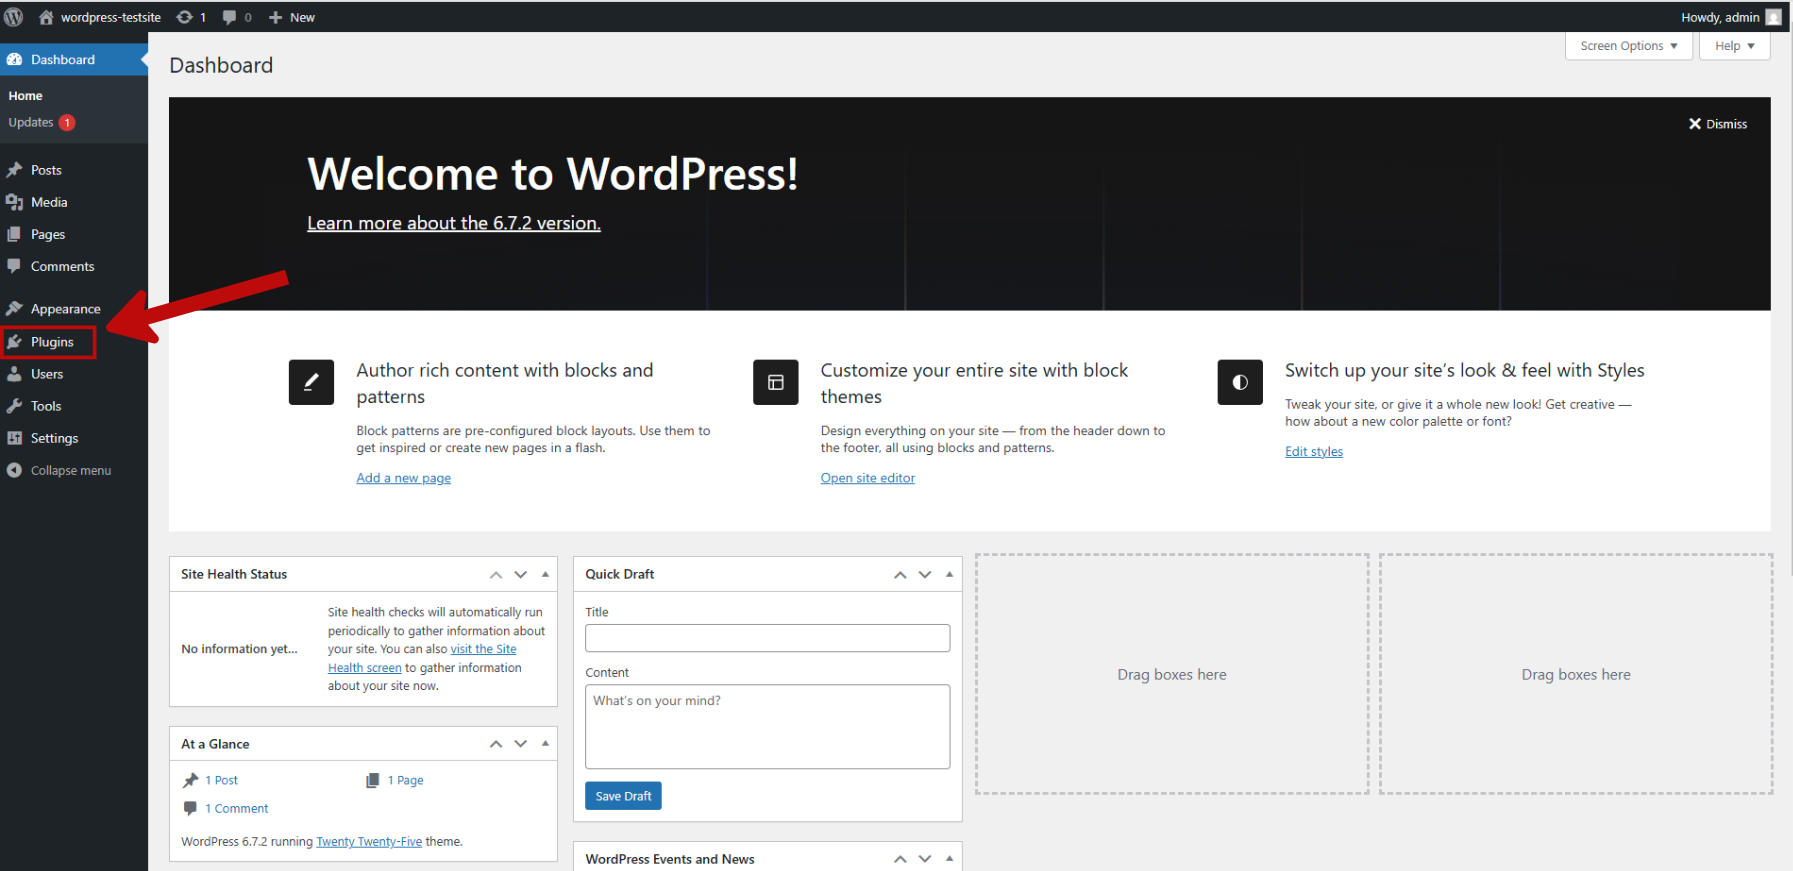
1. Log in to your WordPress admin dashboard
You can usually access your dashboard by visitingyourdomain.com/wp-admin/. Alternatively, you may be able to log in via your web hosting provider’s control panel.
2. Install and Enable the SketricGen Chat Widget
-
In the left sidebar of your WordPress admin dashboard, click on Plugins.
-
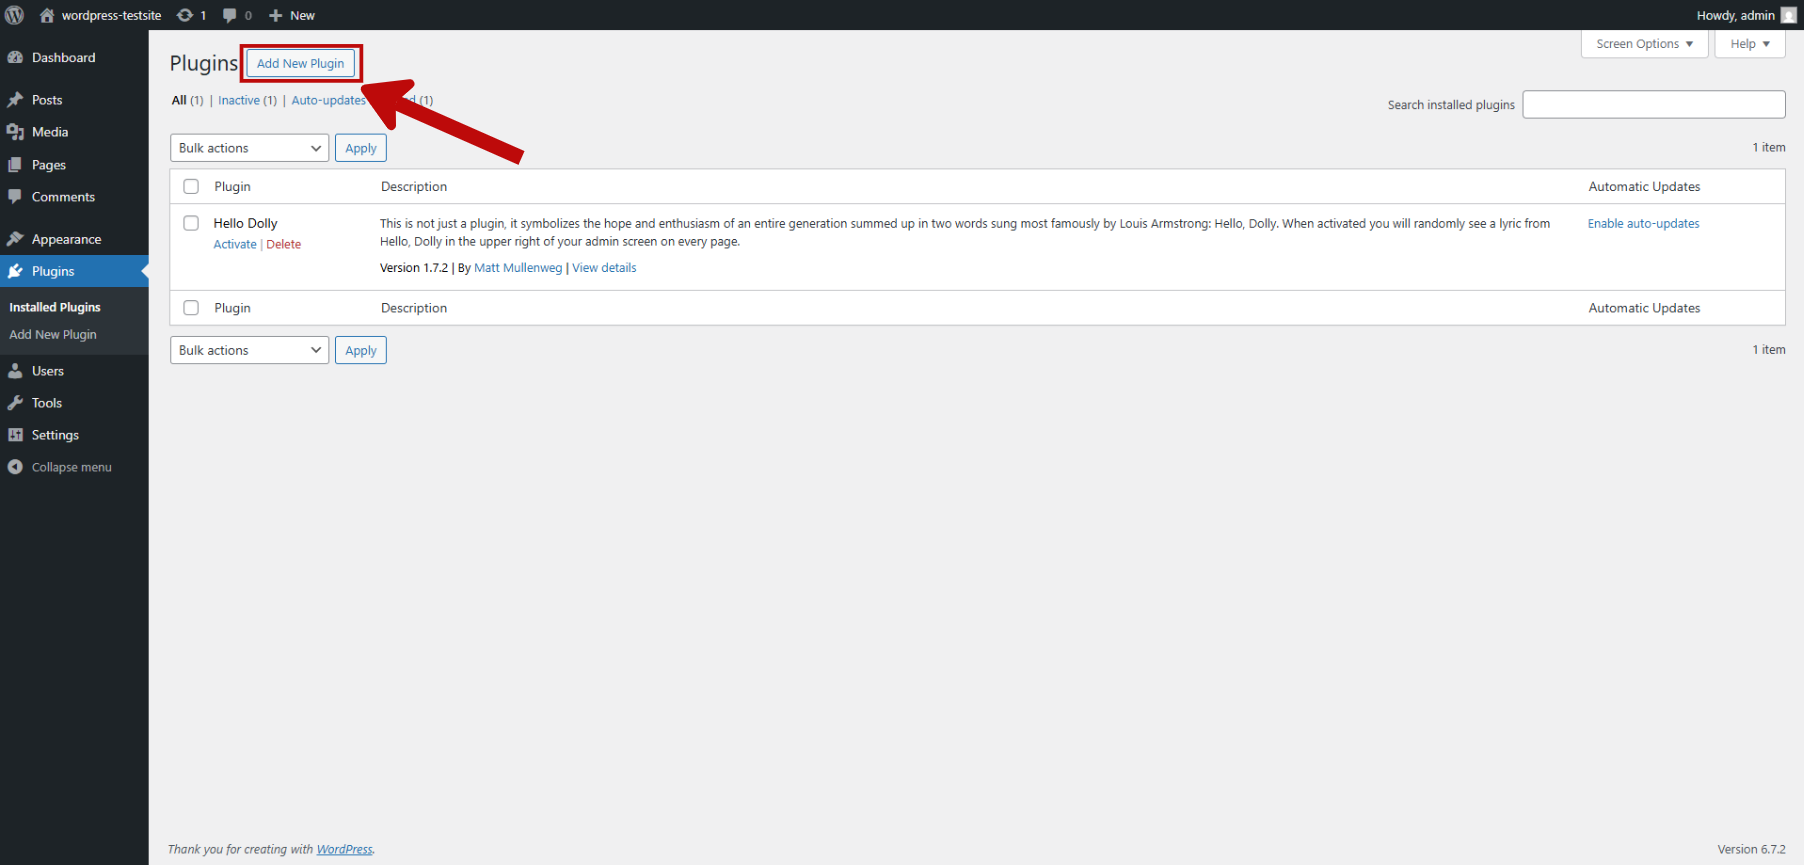
Click Add New Plugin at the top of the next page.
-
In the search bar on the next page, type “SketricGen” to search for the SketricGen plugin.
Click Install Now, then Activate.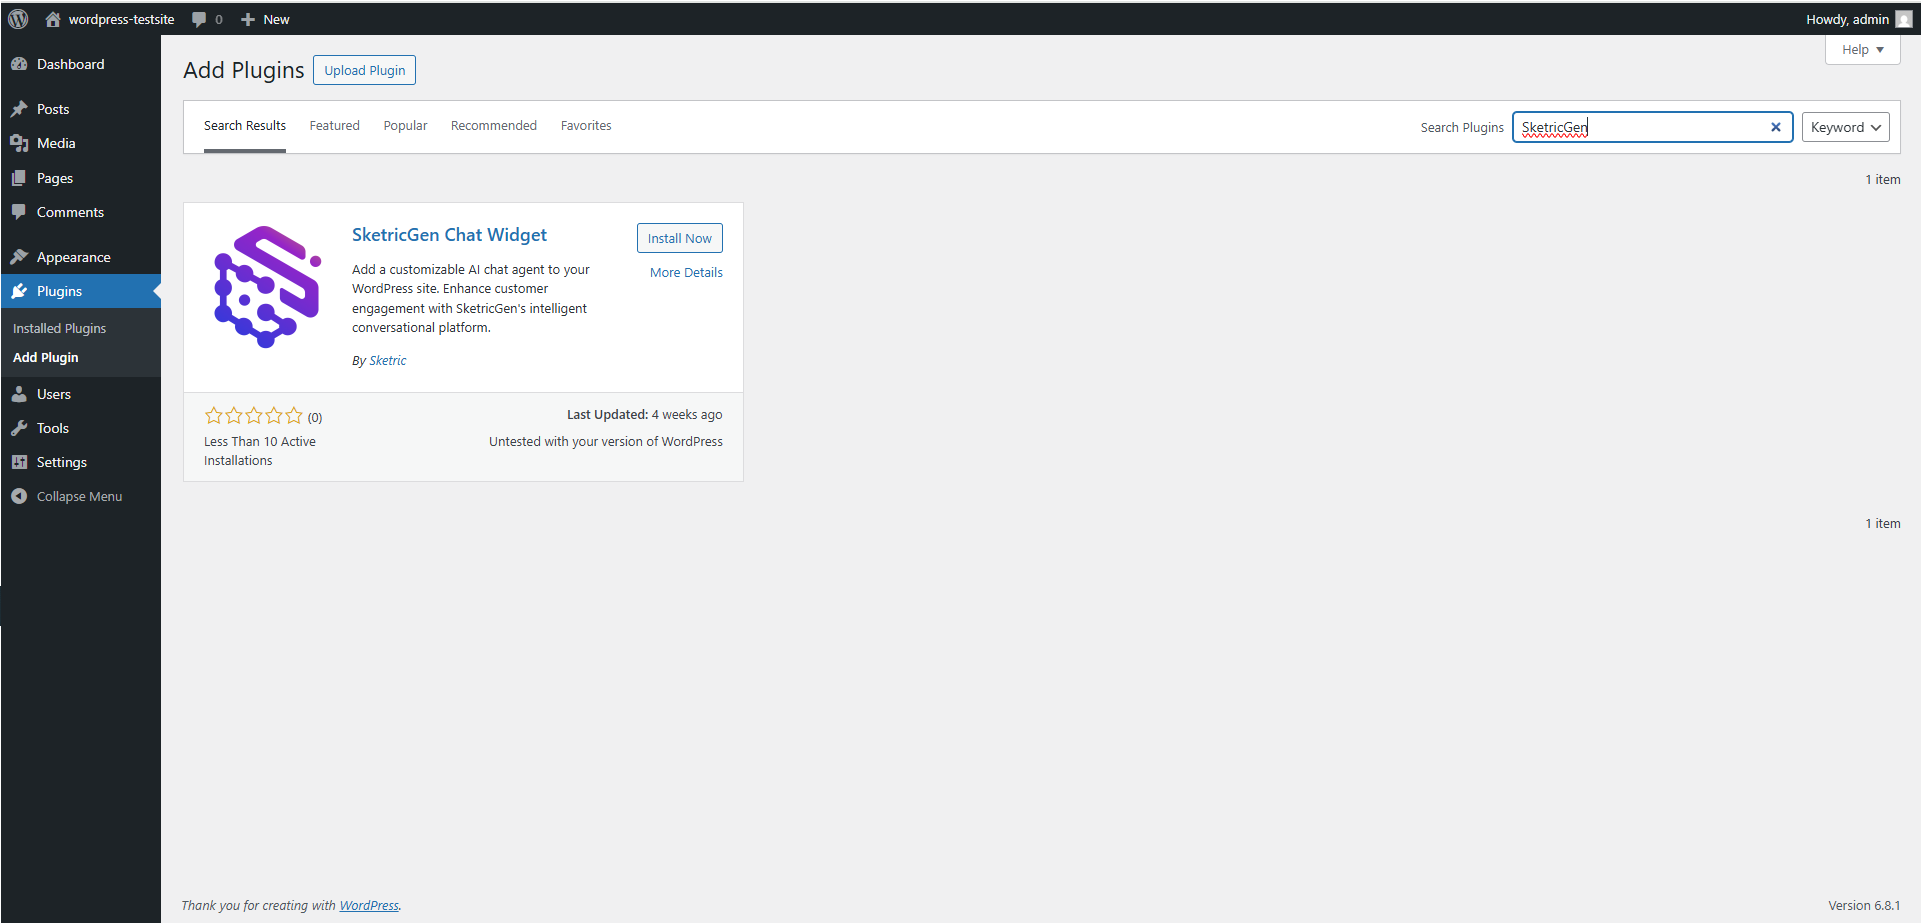
3. Get your Agent ID from SketricGen Dashboard
Go to your agent’s playground and in the Publish sidebar copy the Agent ID — it should look like “asst_…”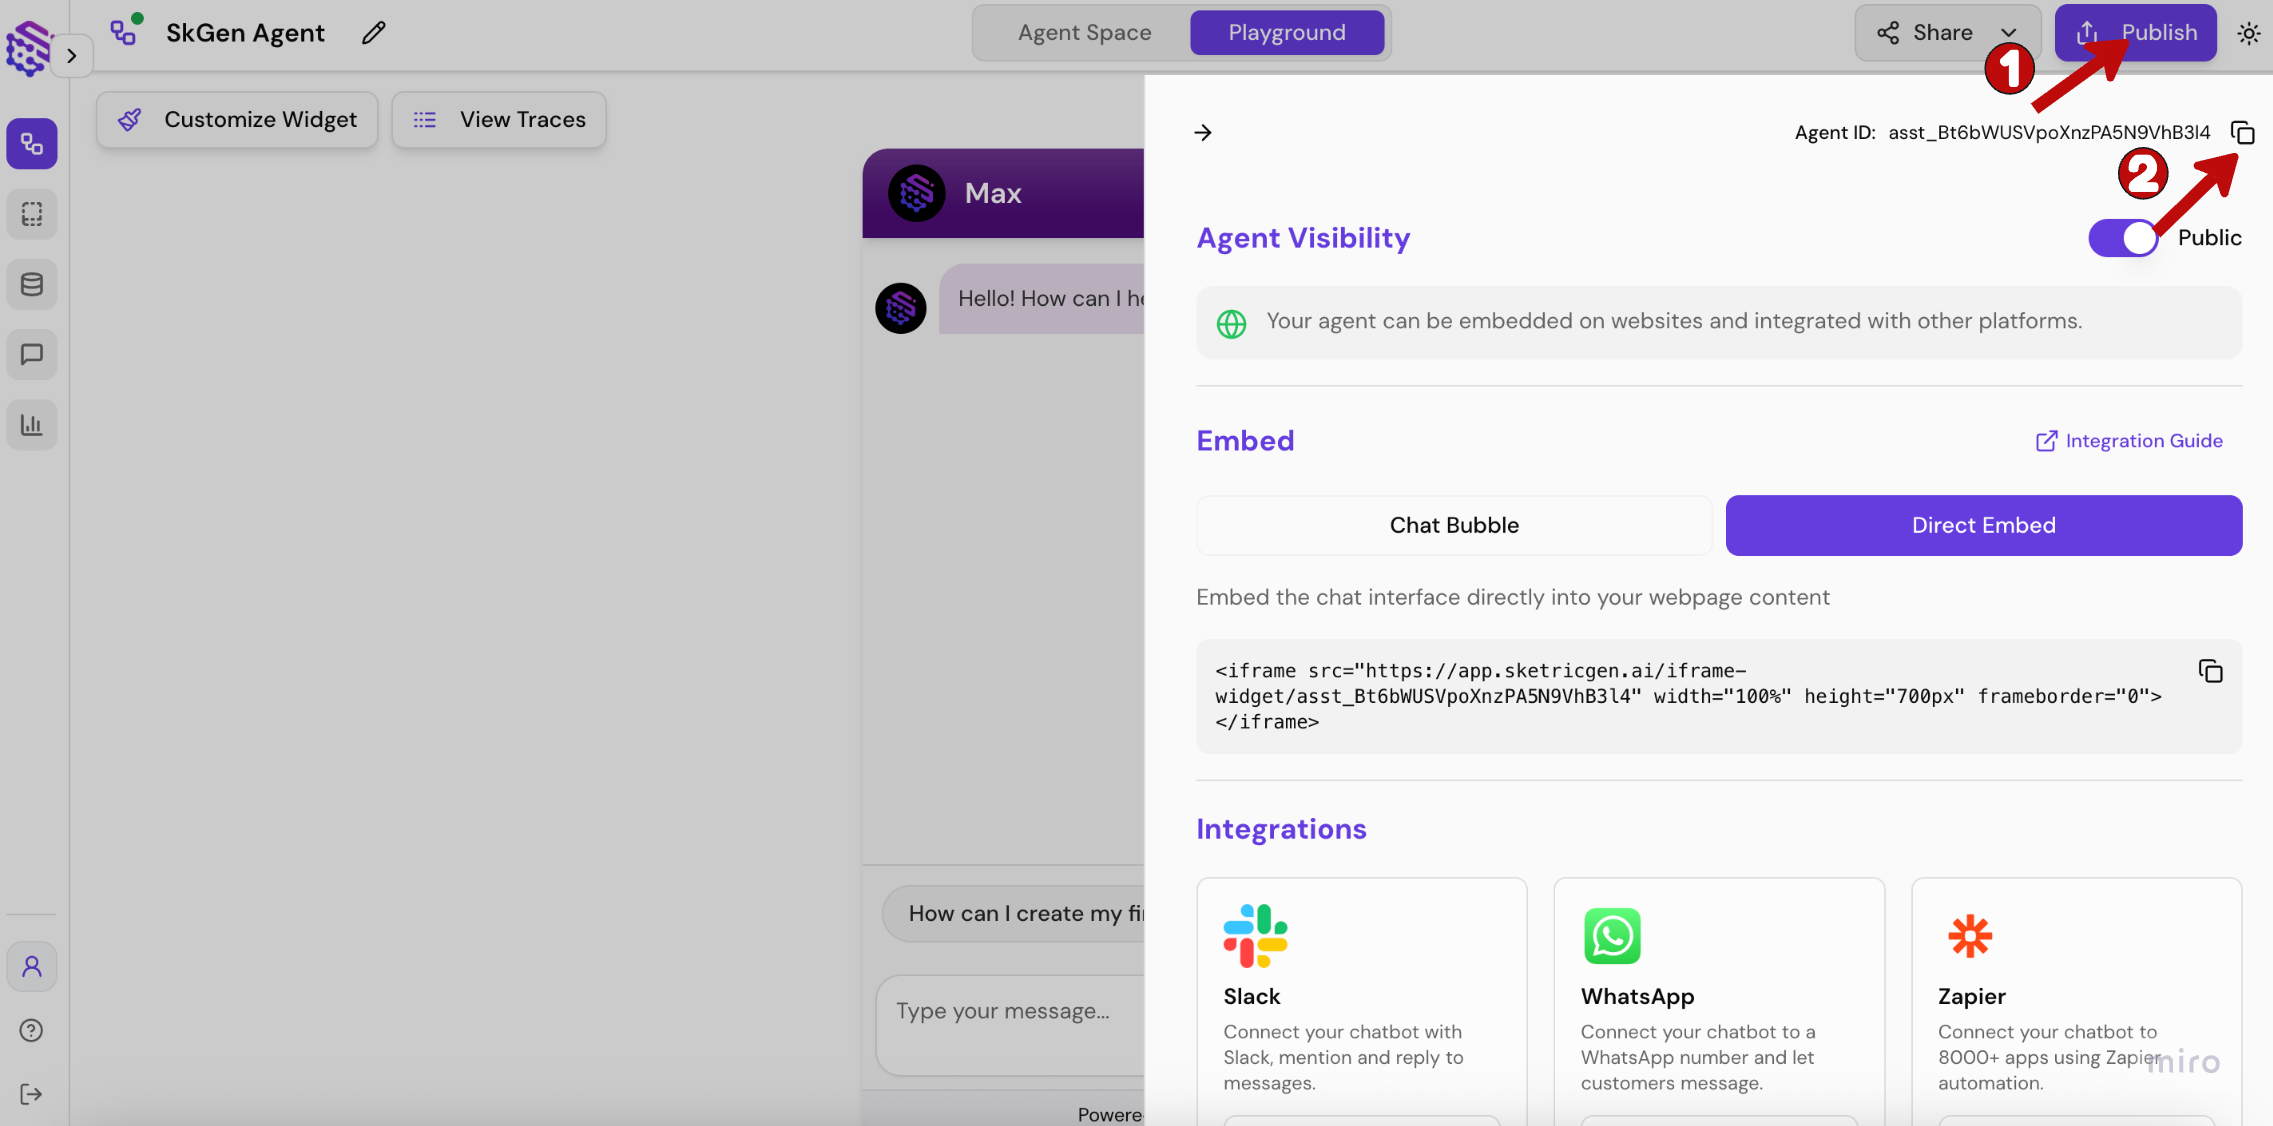
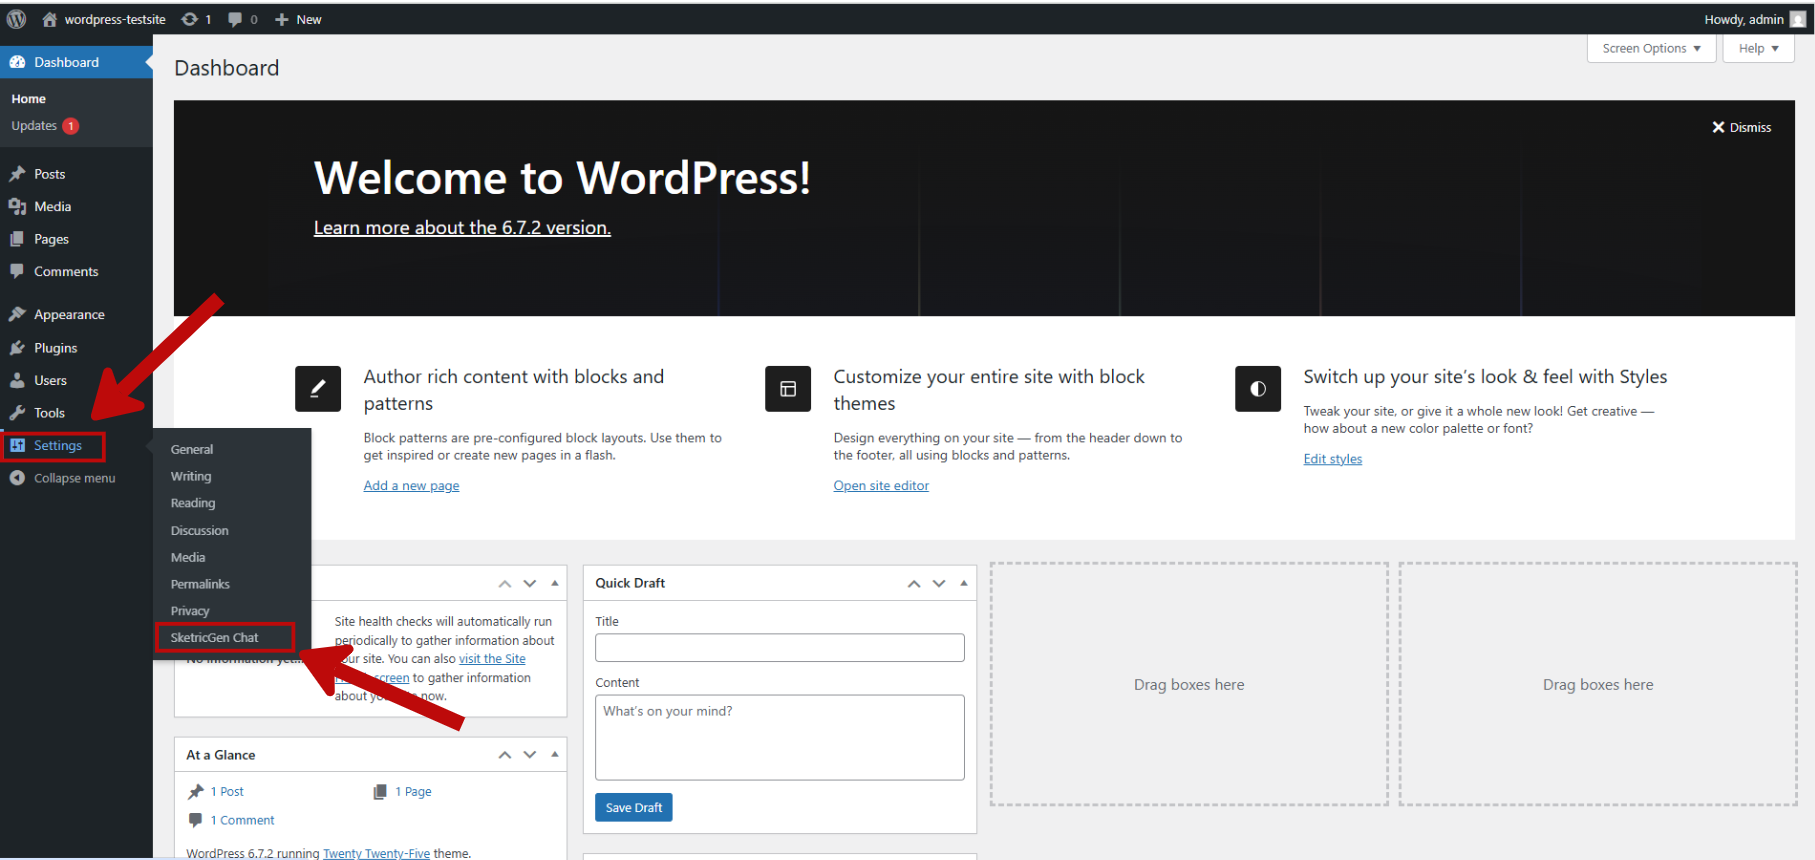
4. Add your Agent ID
-
In the left sidebar on your admin dashboard, click SketricGen Chat under Settings.
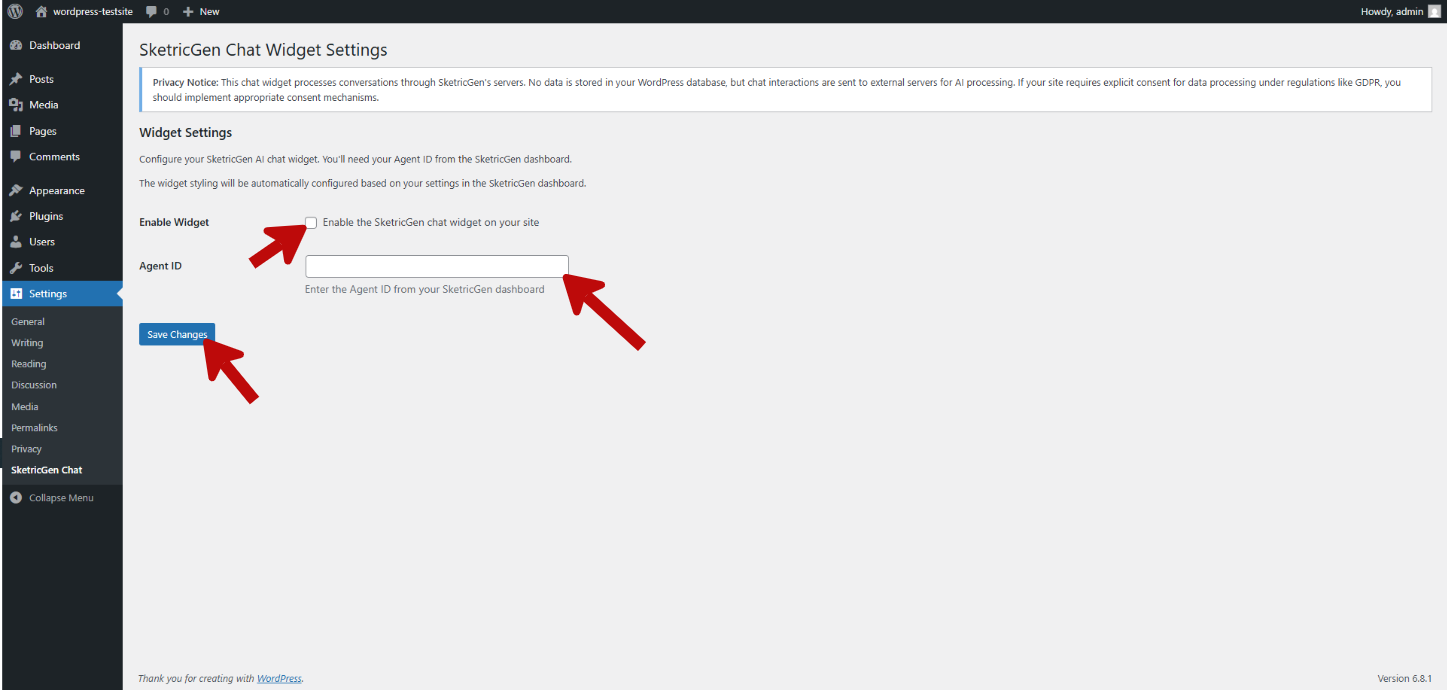
-
Enter your Agent ID, enable the chat widget, and click “Save Changes”.
Step 3: Test your widget on live website