> ## Documentation Index
> Fetch the complete documentation index at: https://docs.sketricgen.ai/llms.txt
> Use this file to discover all available pages before exploring further.
# Deploy to Zapier
> Integrate your SketricGen Brand Agent with Zapier.
## **Step 1: Sign Into SketricGen and Set Up Your Brand Agent**
To get started with the integration, [**sign in to your SketricGen account**](https://www.sketricgen.ai/). If you don’t have an account yet, you can create one for [**free**](https://www.sketricgen.ai/). Once you’re logged in, begin setting up your Brand Agent by uploading your data sources. These can include files, text snippets, websites, or Q\&A pairs, which will serve as the knowledge base for your Brand Agent.
If you need assistance with setting up a working SketricGen Brand Agent, refer to the [**step-by-step guide**](https://docs.sketricgen.ai/getting-started/quickstart) for creating and deploying your Brand Agent.
## **Step 2: Copy your SketricGen User ID and API Key**
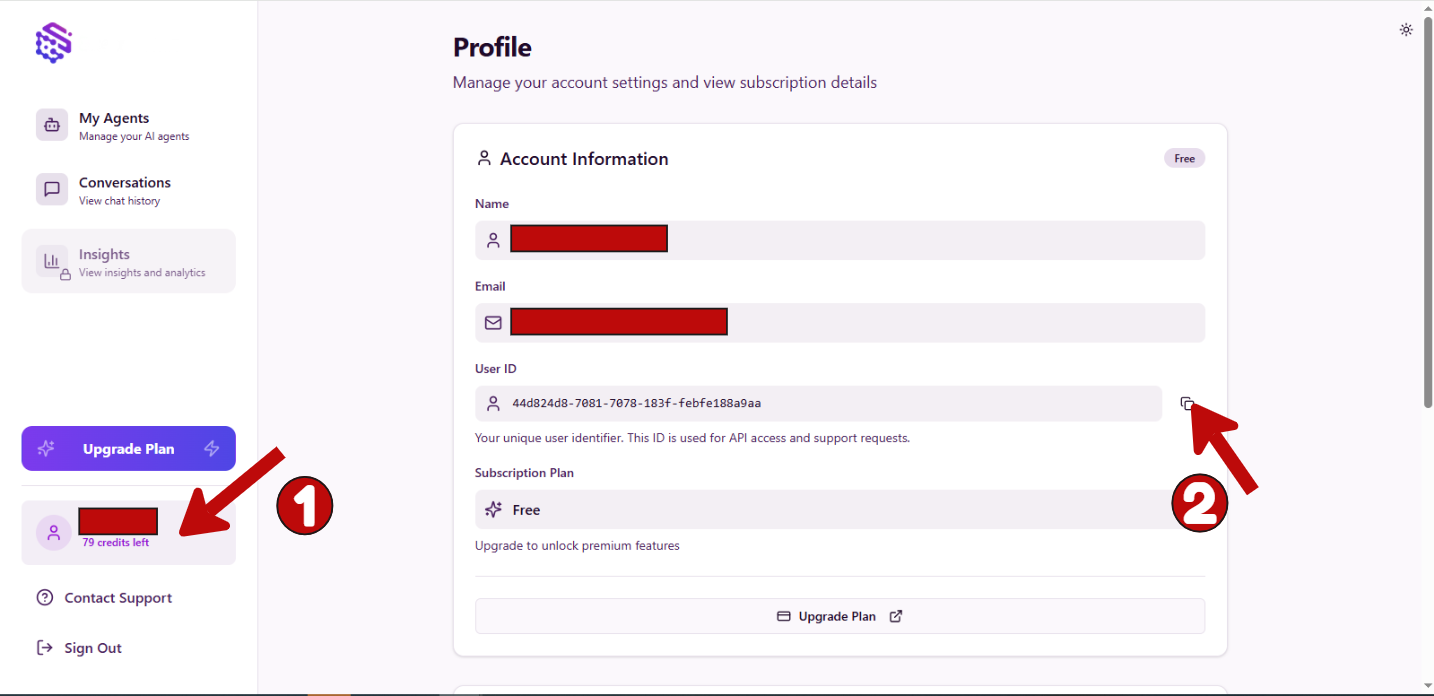
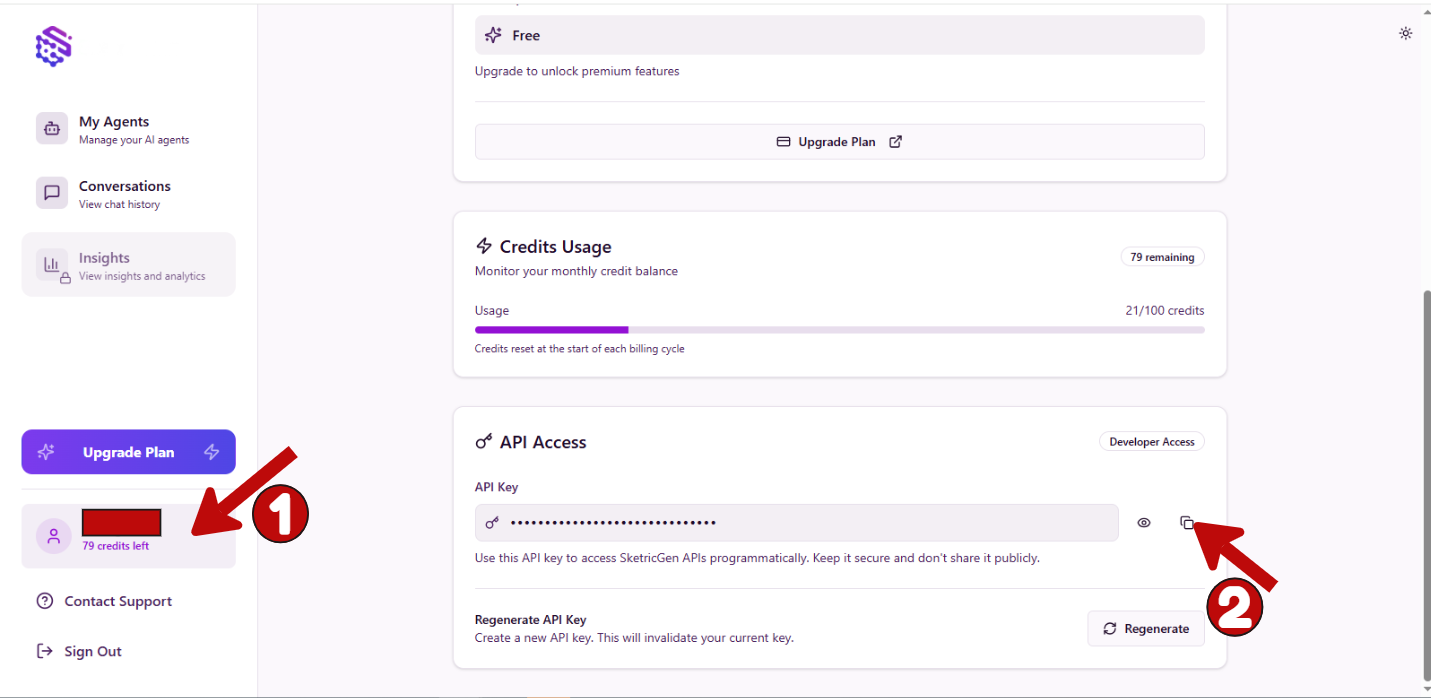
Go to the profile section of your SketricGen account and copy your User ID and API Key which you will paste in Zapier in step 3.
 ## **Step 3: Connect SketricGen with Zapier**
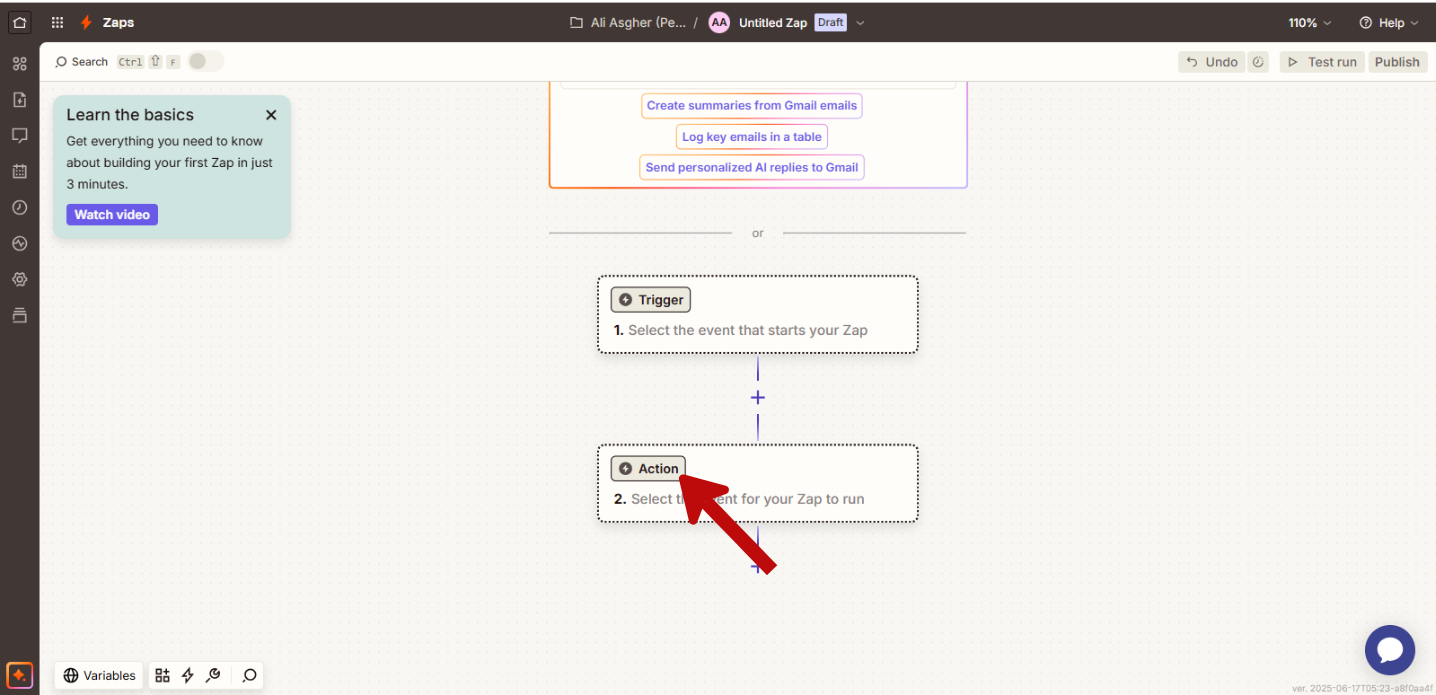
### **1. Create a Zap Workflow**
## **Step 3: Connect SketricGen with Zapier**
### **1. Create a Zap Workflow**
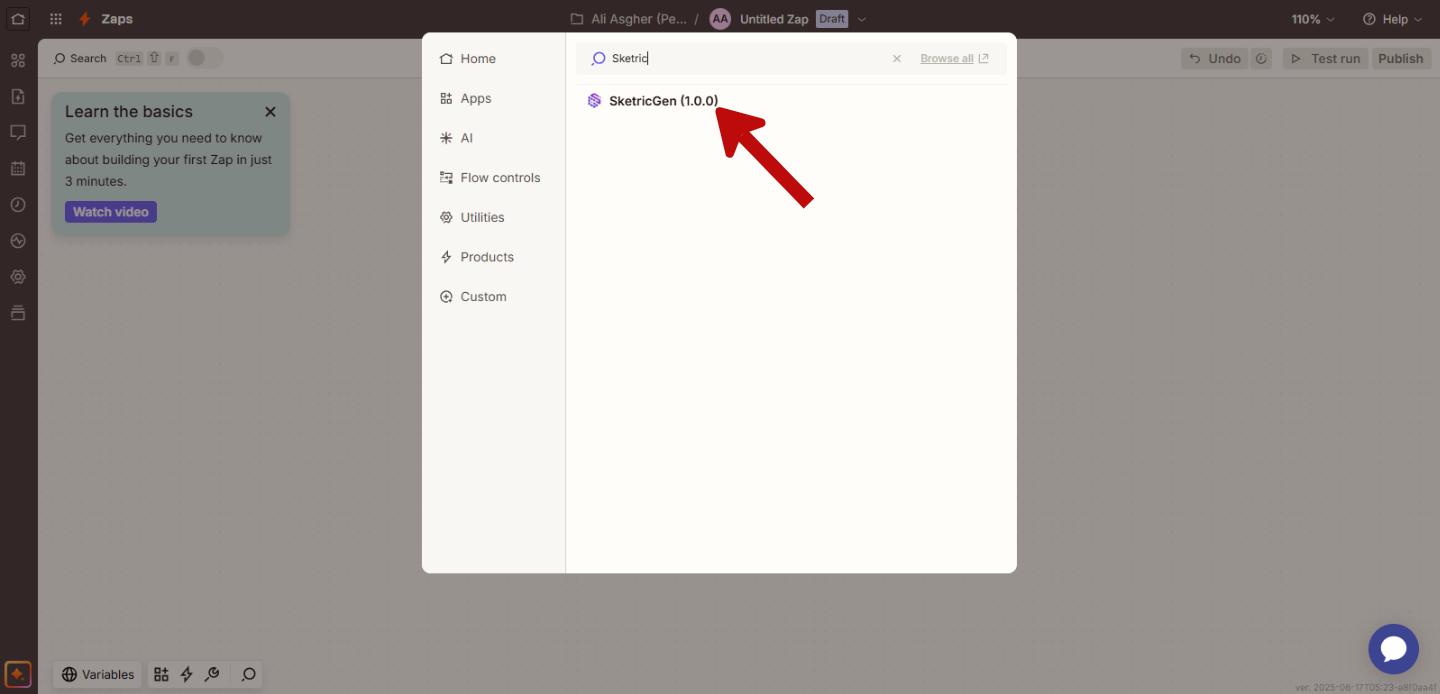
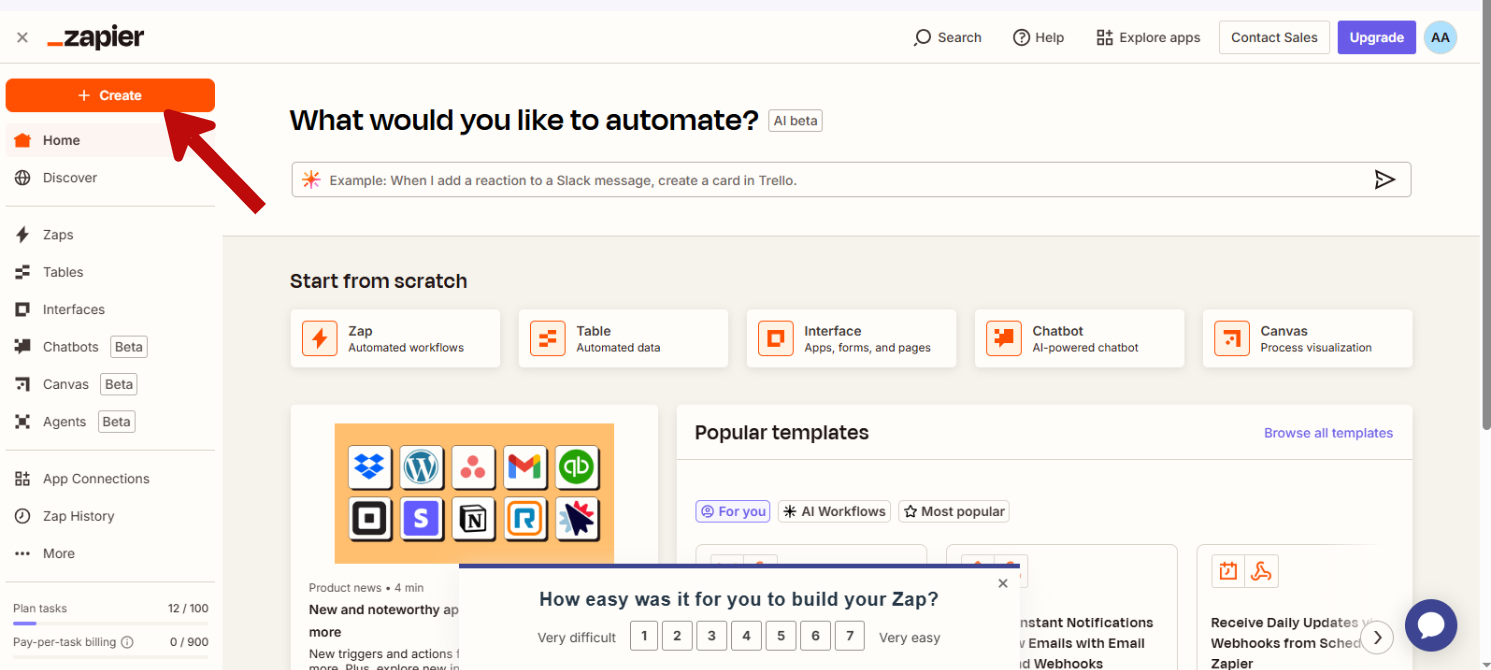 ### **2. Add SketricGen Integration (We currently support adding our Integration as an Action in a Zapier Workflow)**
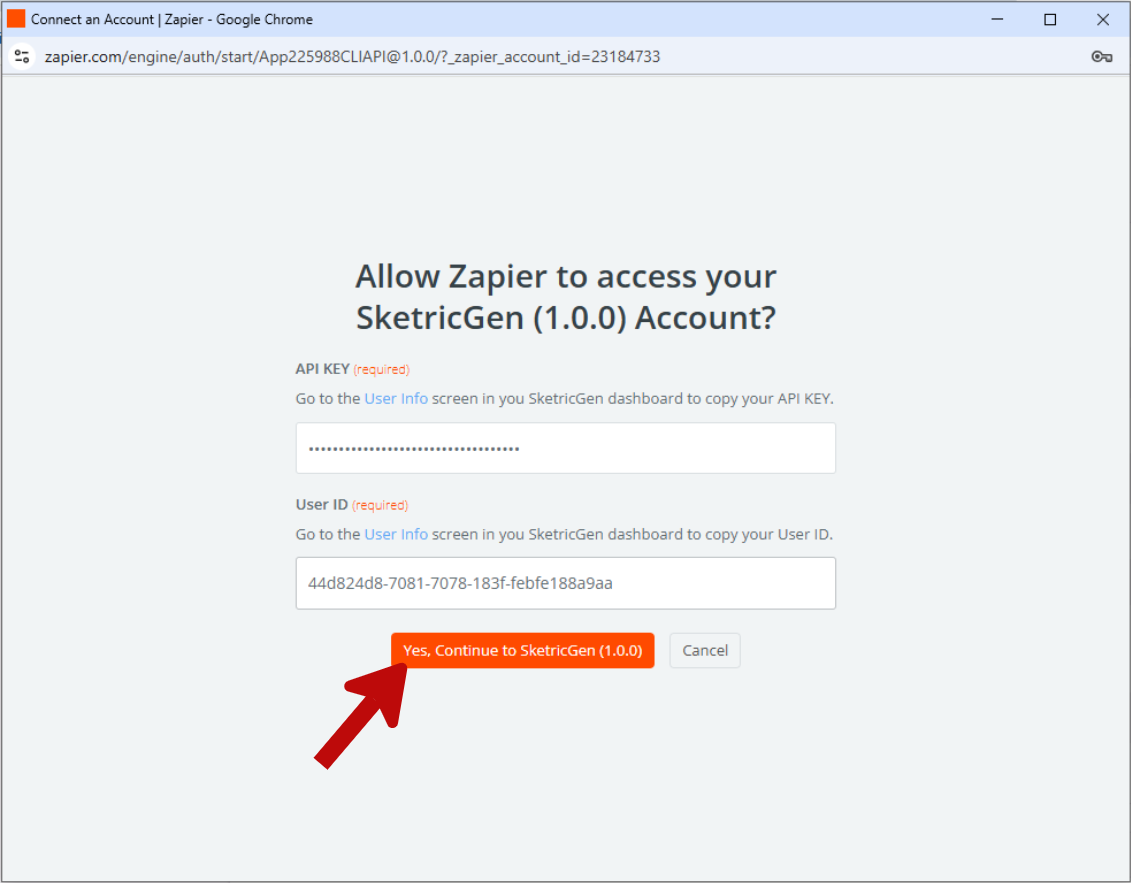
 ### **3. Paste the API Key and User ID you copied in Step 2 to connect your SketricGen account with Zapier**
 ## **Step 4: Copy your Agent ID**
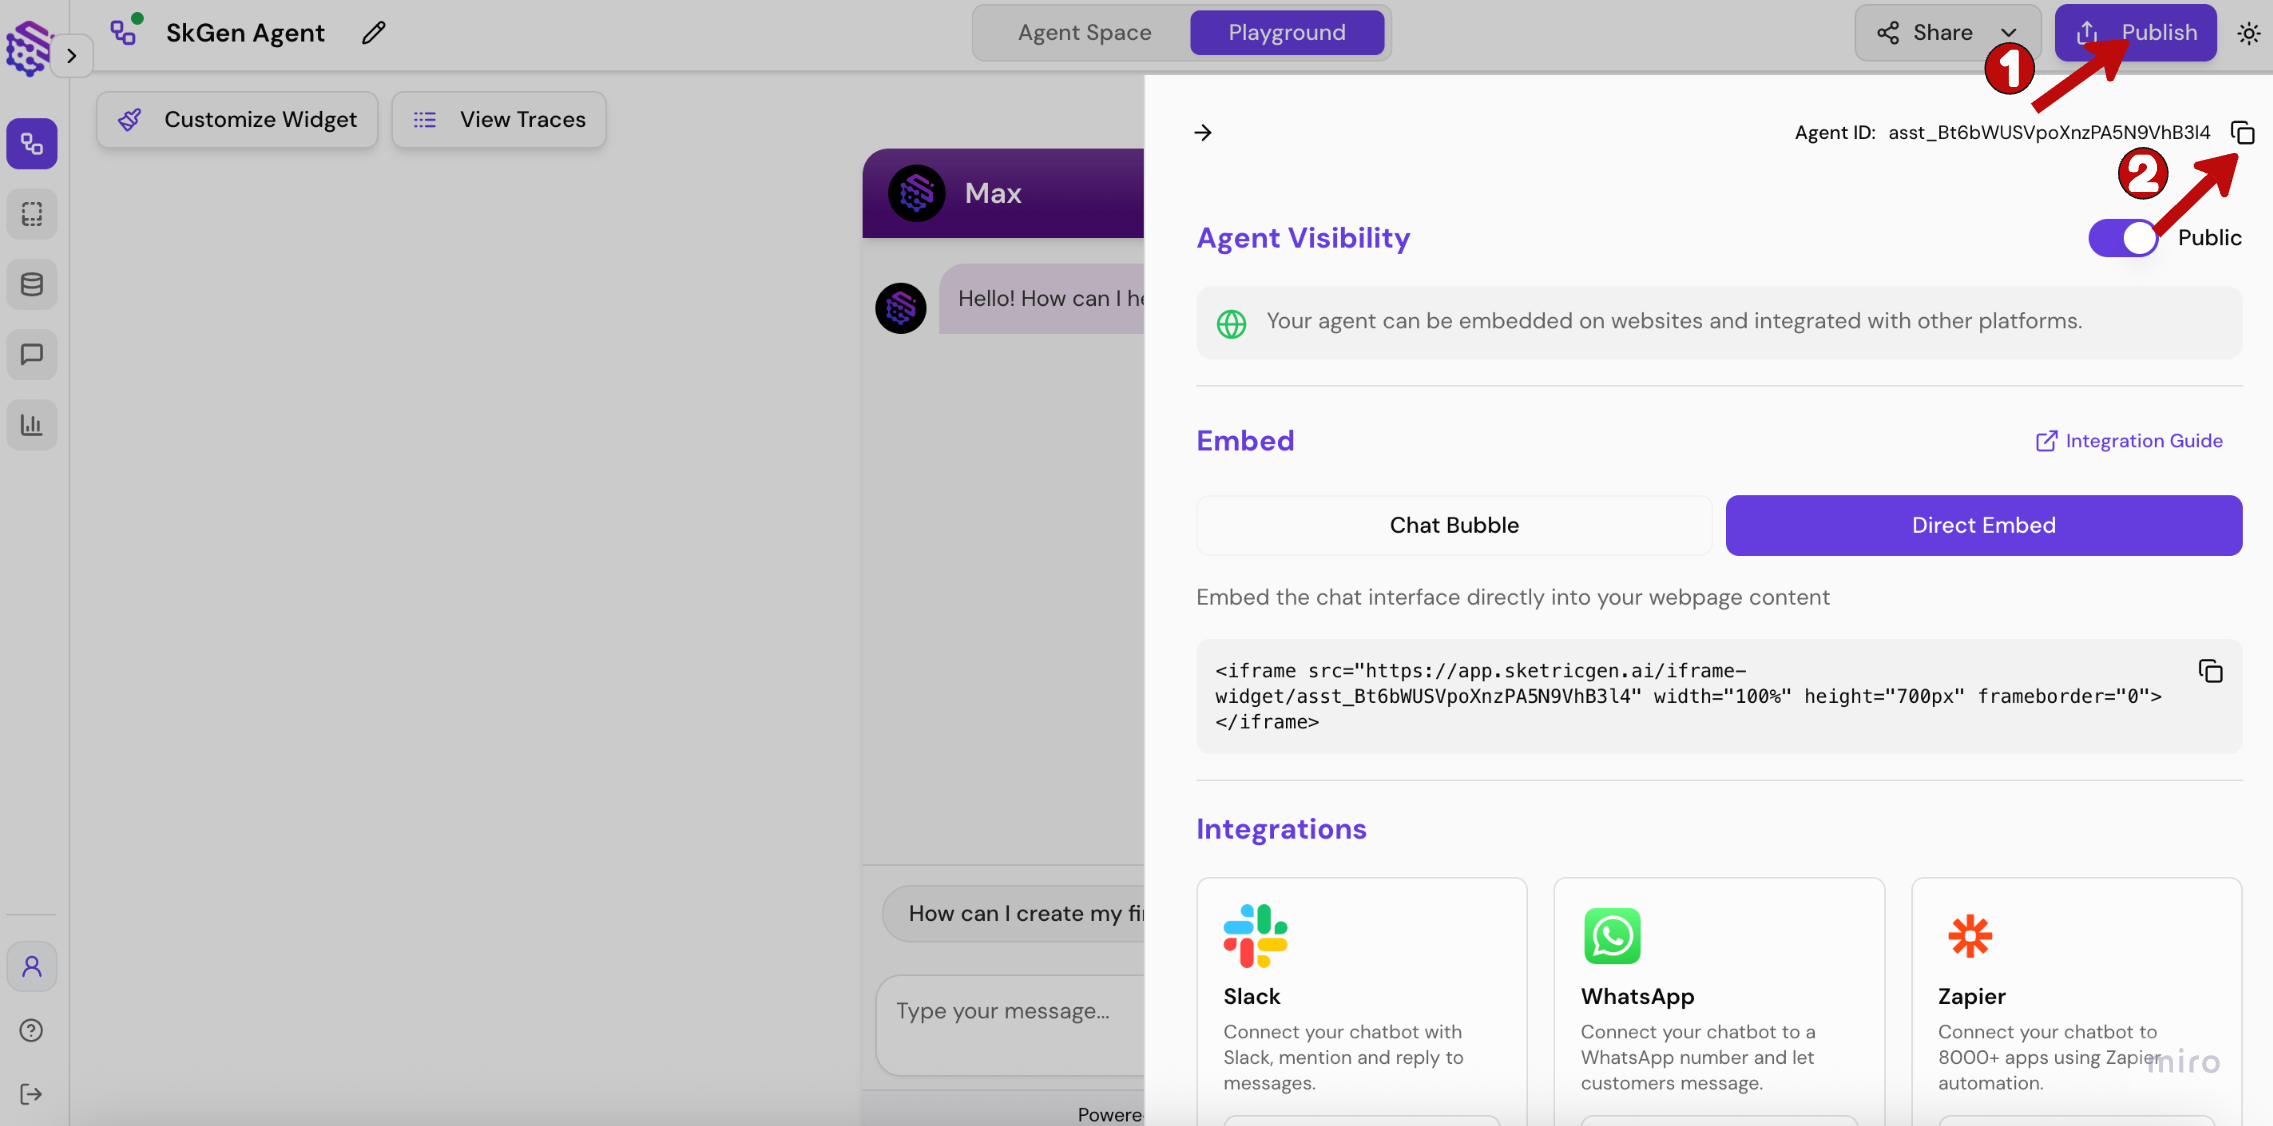
Go to your Brand Agent playground and in the **Publish** sidebar copy the Agent ID **“asst\_…”**
## **Step 4: Copy your Agent ID**
Go to your Brand Agent playground and in the **Publish** sidebar copy the Agent ID **“asst\_…”**
 ## **Step 5: Configure your integration**
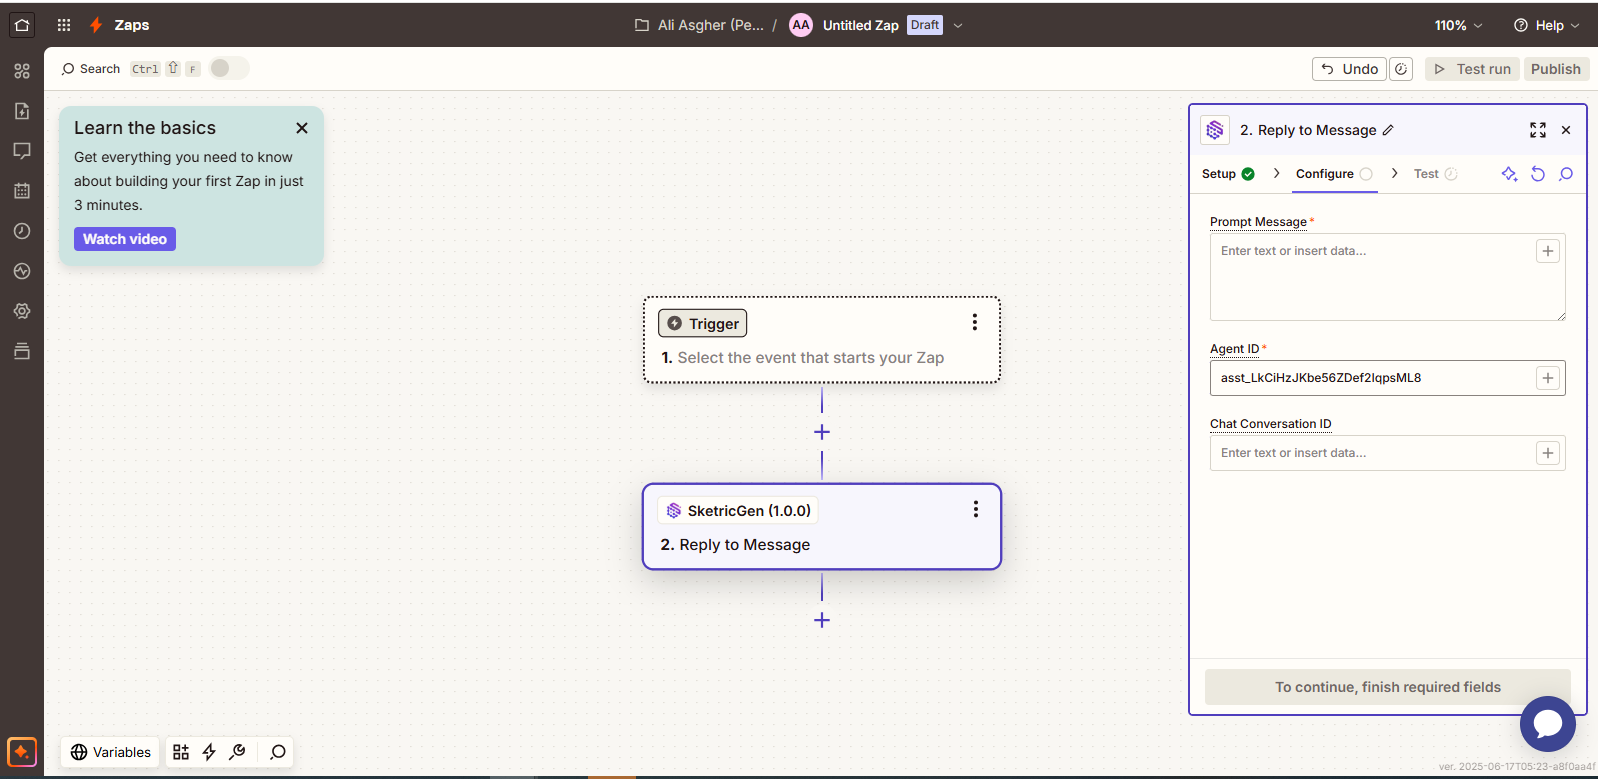
You can now add triggers and actions in your Zap workflow with your SketricGen integration by adding a Prompt Message and your Agent ID. You can also add a Conversation ID so your Brand Agent can maintain context for multi-turn conversations.
Your integration will always return a Response Text which you can further use to generate automated replies, generate leads and much more.
## **Step 5: Configure your integration**
You can now add triggers and actions in your Zap workflow with your SketricGen integration by adding a Prompt Message and your Agent ID. You can also add a Conversation ID so your Brand Agent can maintain context for multi-turn conversations.
Your integration will always return a Response Text which you can further use to generate automated replies, generate leads and much more.