> ## Documentation Index
> Fetch the complete documentation index at: https://docs.sketricgen.ai/llms.txt
> Use this file to discover all available pages before exploring further.
# Deploy to Telegram
> Connect your SketricGen Brand Agent to Telegram.
## **Step 1: Sign Into SketricGen and Set Up Your Brand Agent**
To get started with the integration, **[sign in to your SketricGen account](https://www.sketricgen.ai)**. If you don't have an account yet, you can create one for **[free](https://www.sketricgen.ai)**. Once you're logged in, begin setting up your Brand Agent by uploading your data sources. These can include files, text snippets, websites, or Q\&A pairs, which will serve as the knowledge base for your Brand Agent.
If you need assistance with setting up a working SketricGen Brand Agent, refer to the **[step-by-step guide](https://docs.sketricgen.ai/getting-started/quickstart)** for creating and deploying your Brand Agent.
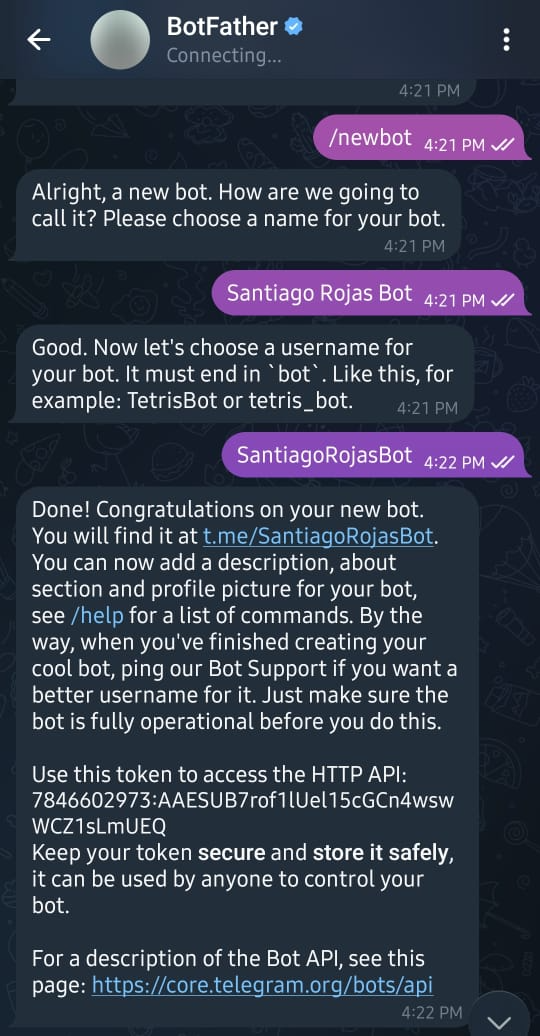
## **Step 2: Generate a Bot Token from Telegram**
1. Go to [@BotFather](https://t.me/BotFather) to create a new bot and copy the generated bot token
 ## **Step 3: Connect the Telegram bot to your SketricGen Brand Agent**
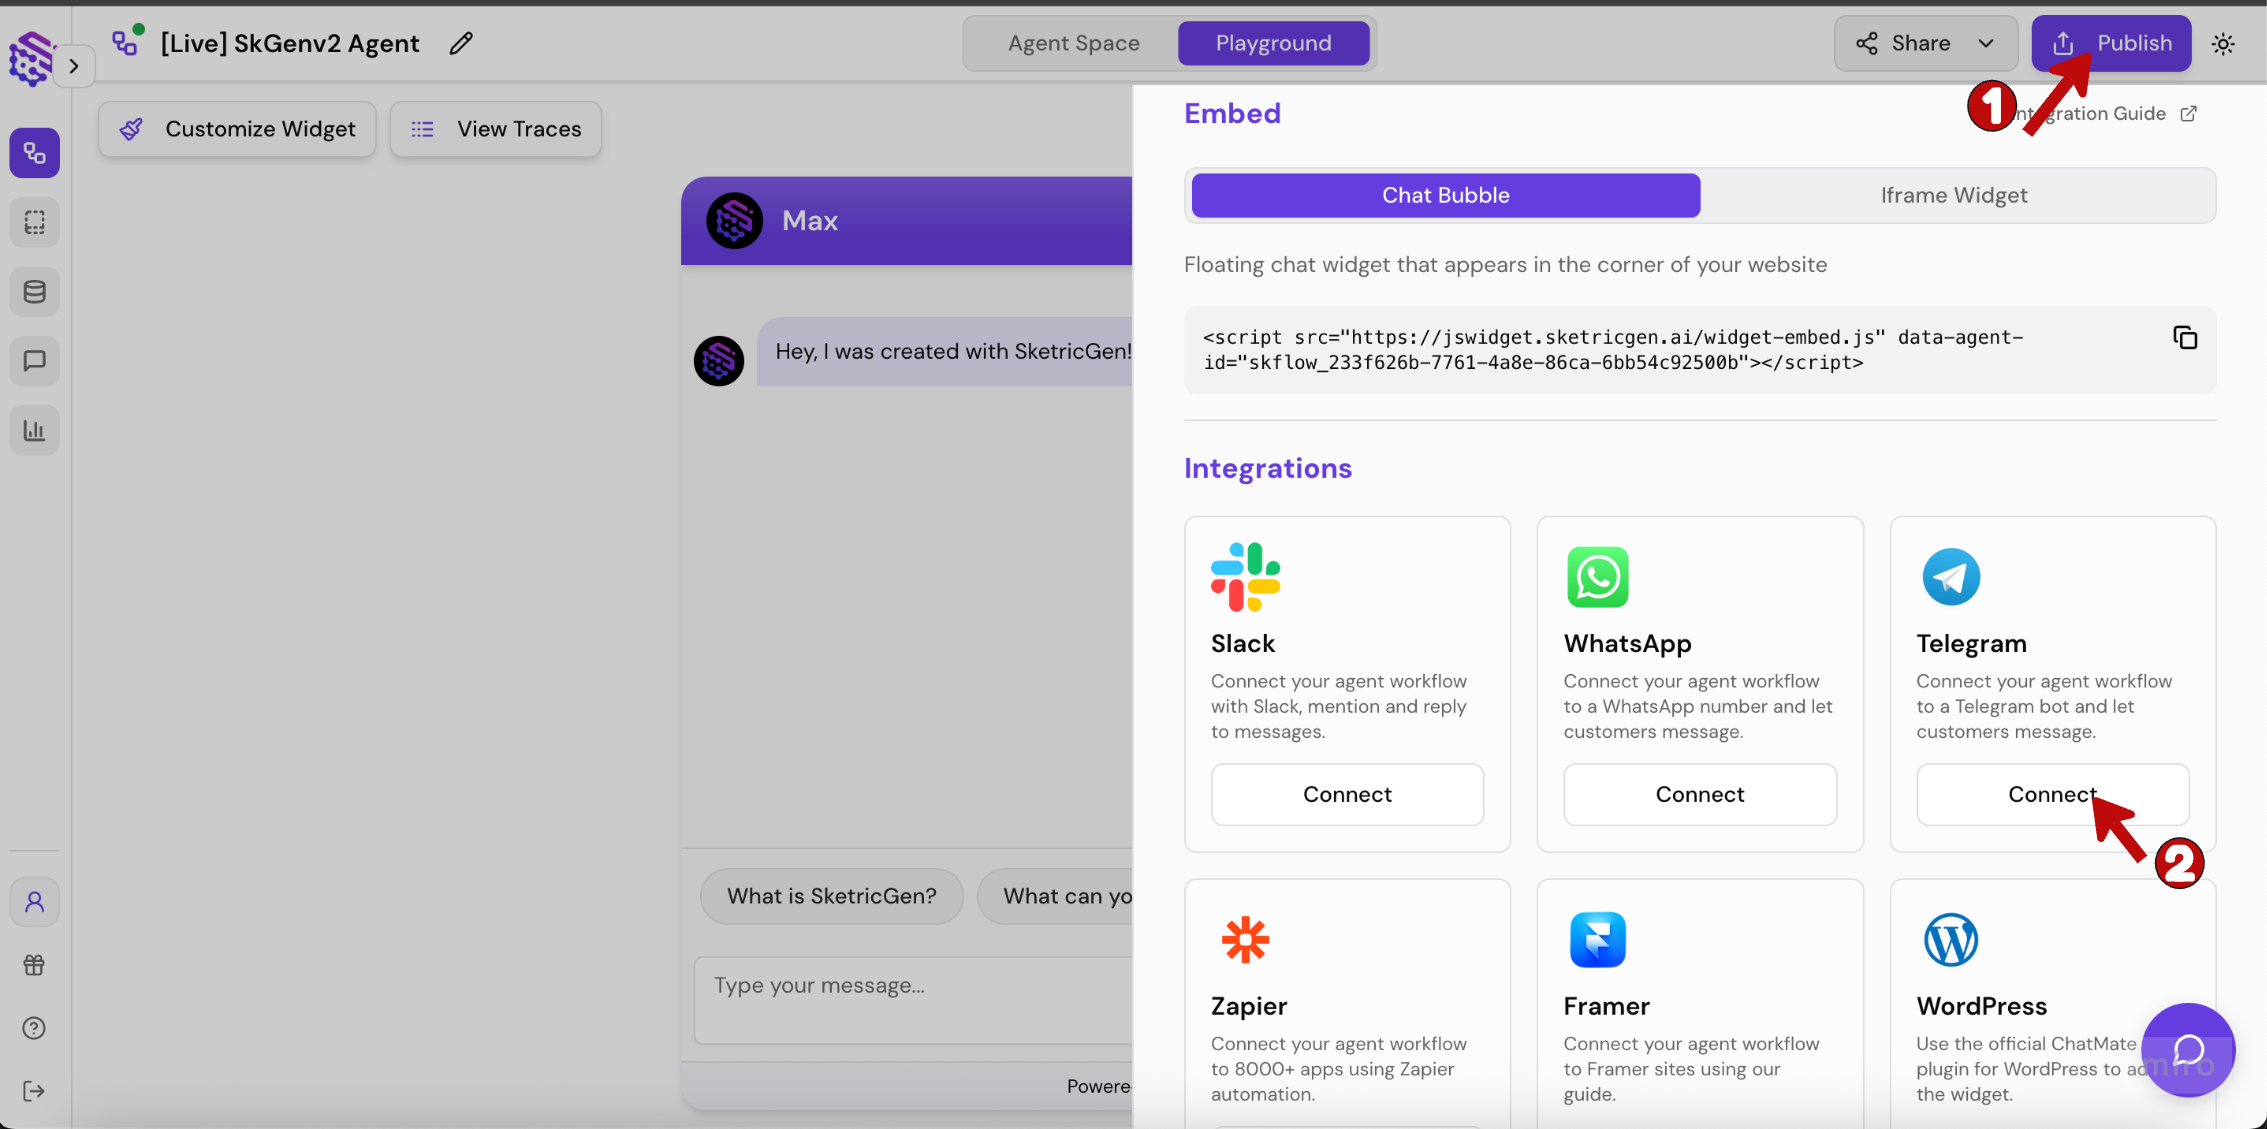
1. Go to the **Publish** section of your Brand Agent and press **Connect** on Telegram
## **Step 3: Connect the Telegram bot to your SketricGen Brand Agent**
1. Go to the **Publish** section of your Brand Agent and press **Connect** on Telegram
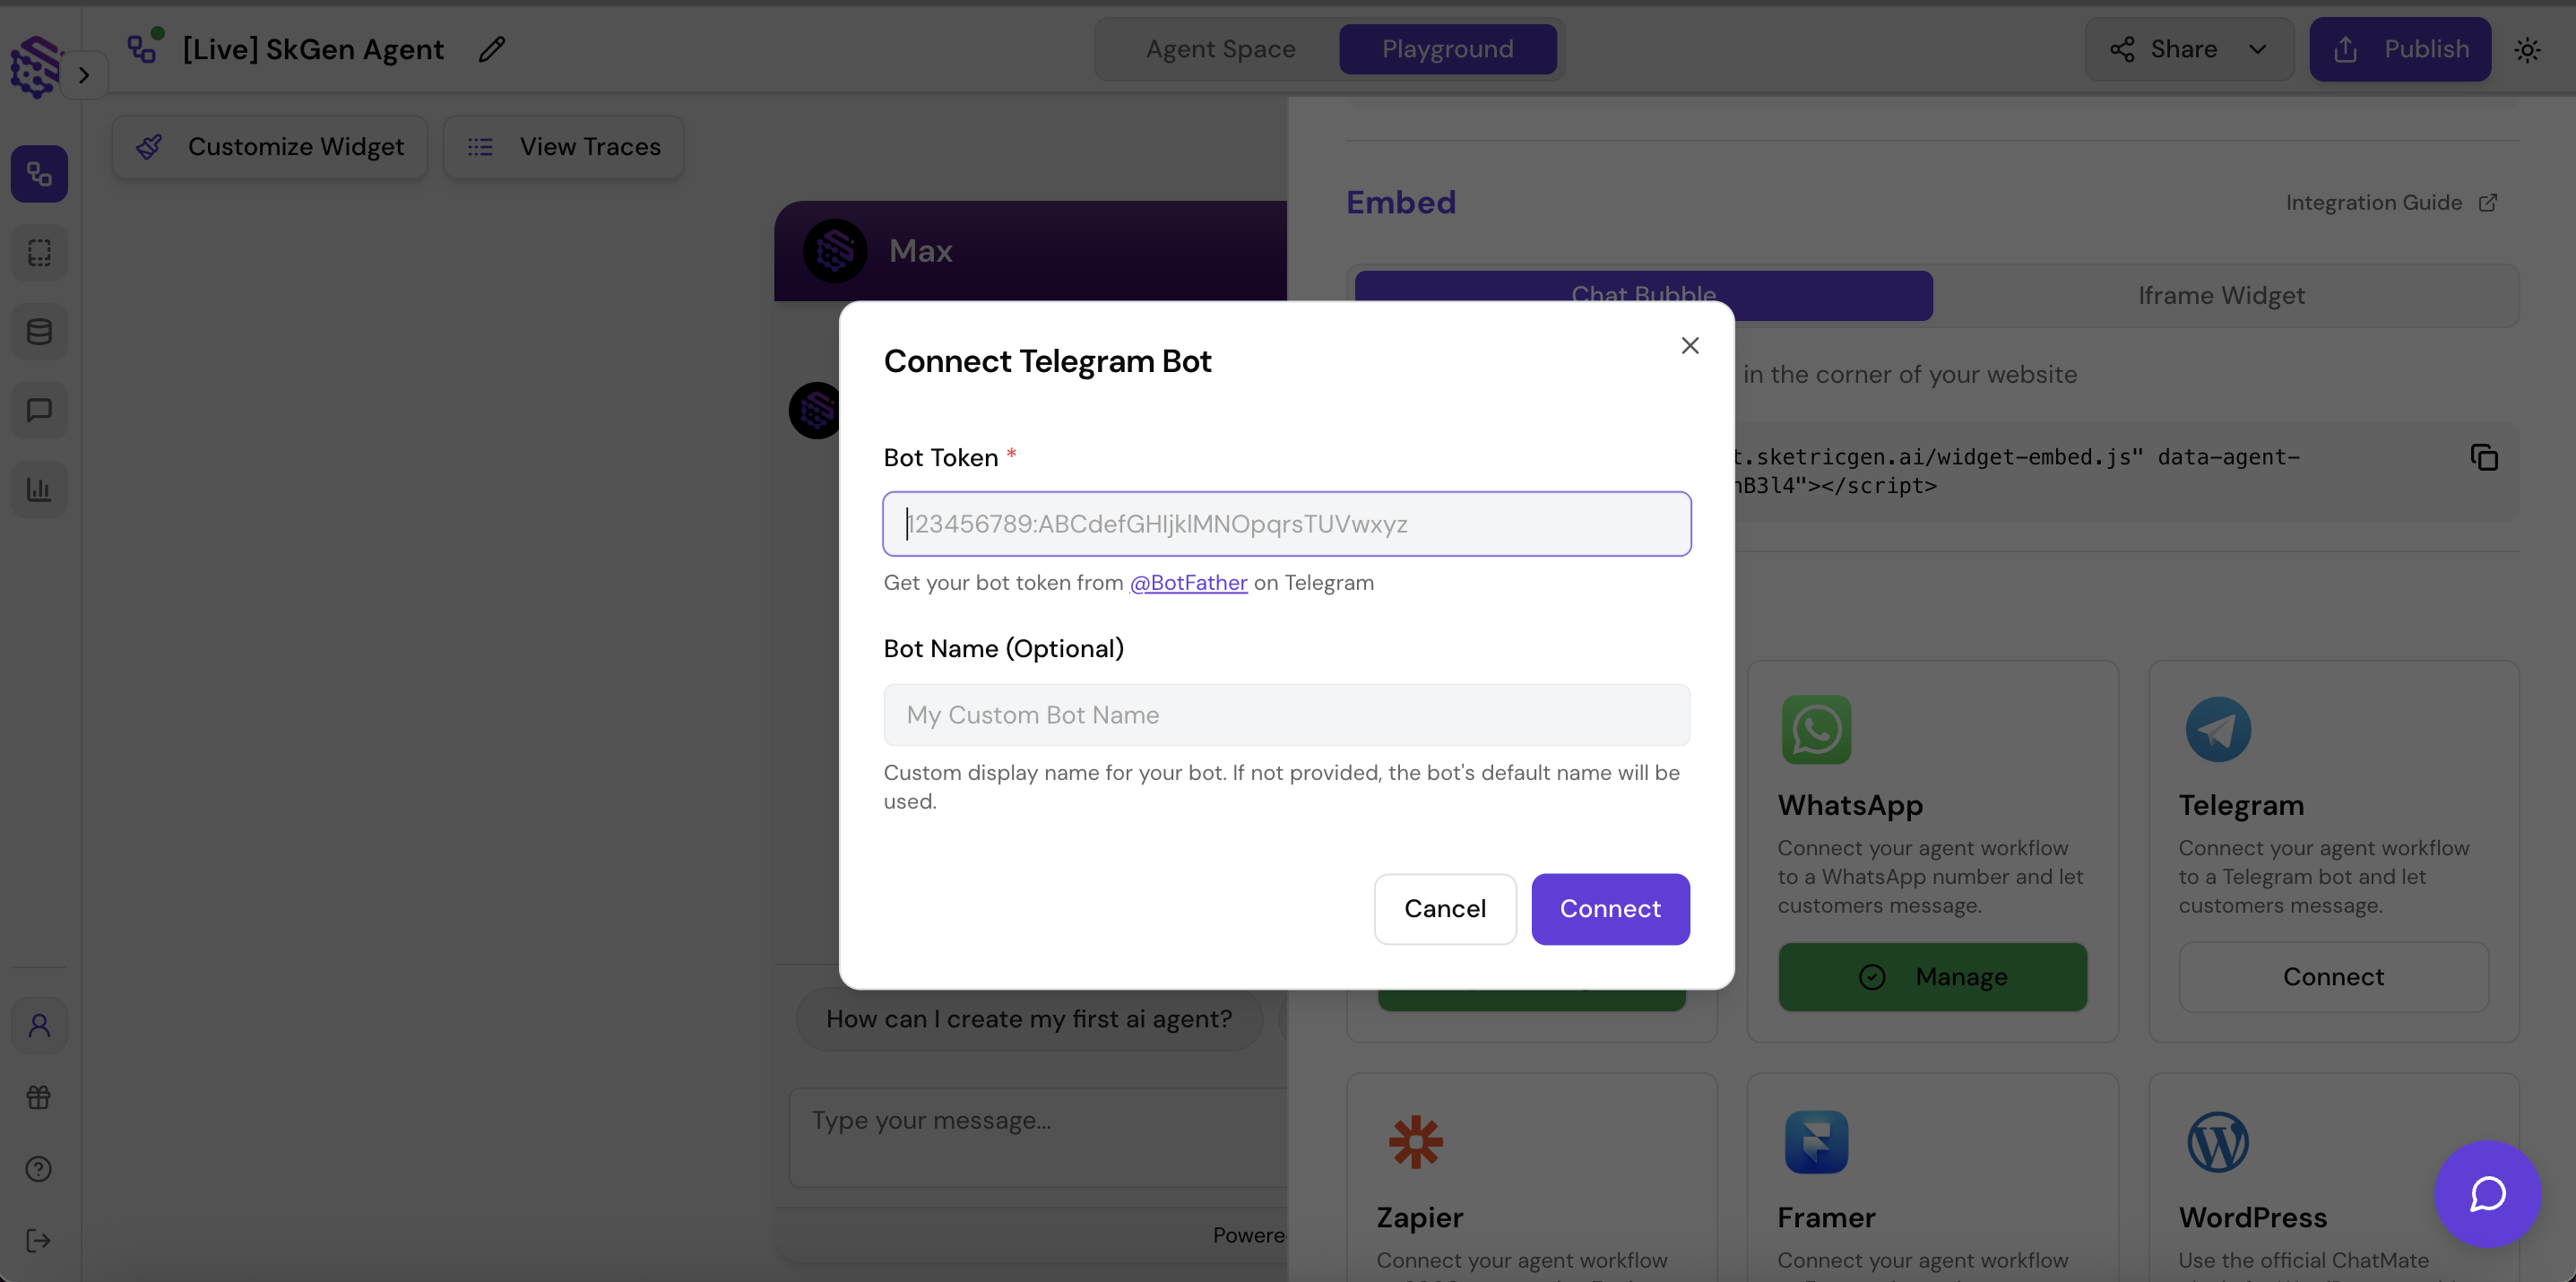
 2. Paste your Bot Token that you copied in Step 2 and press Connect
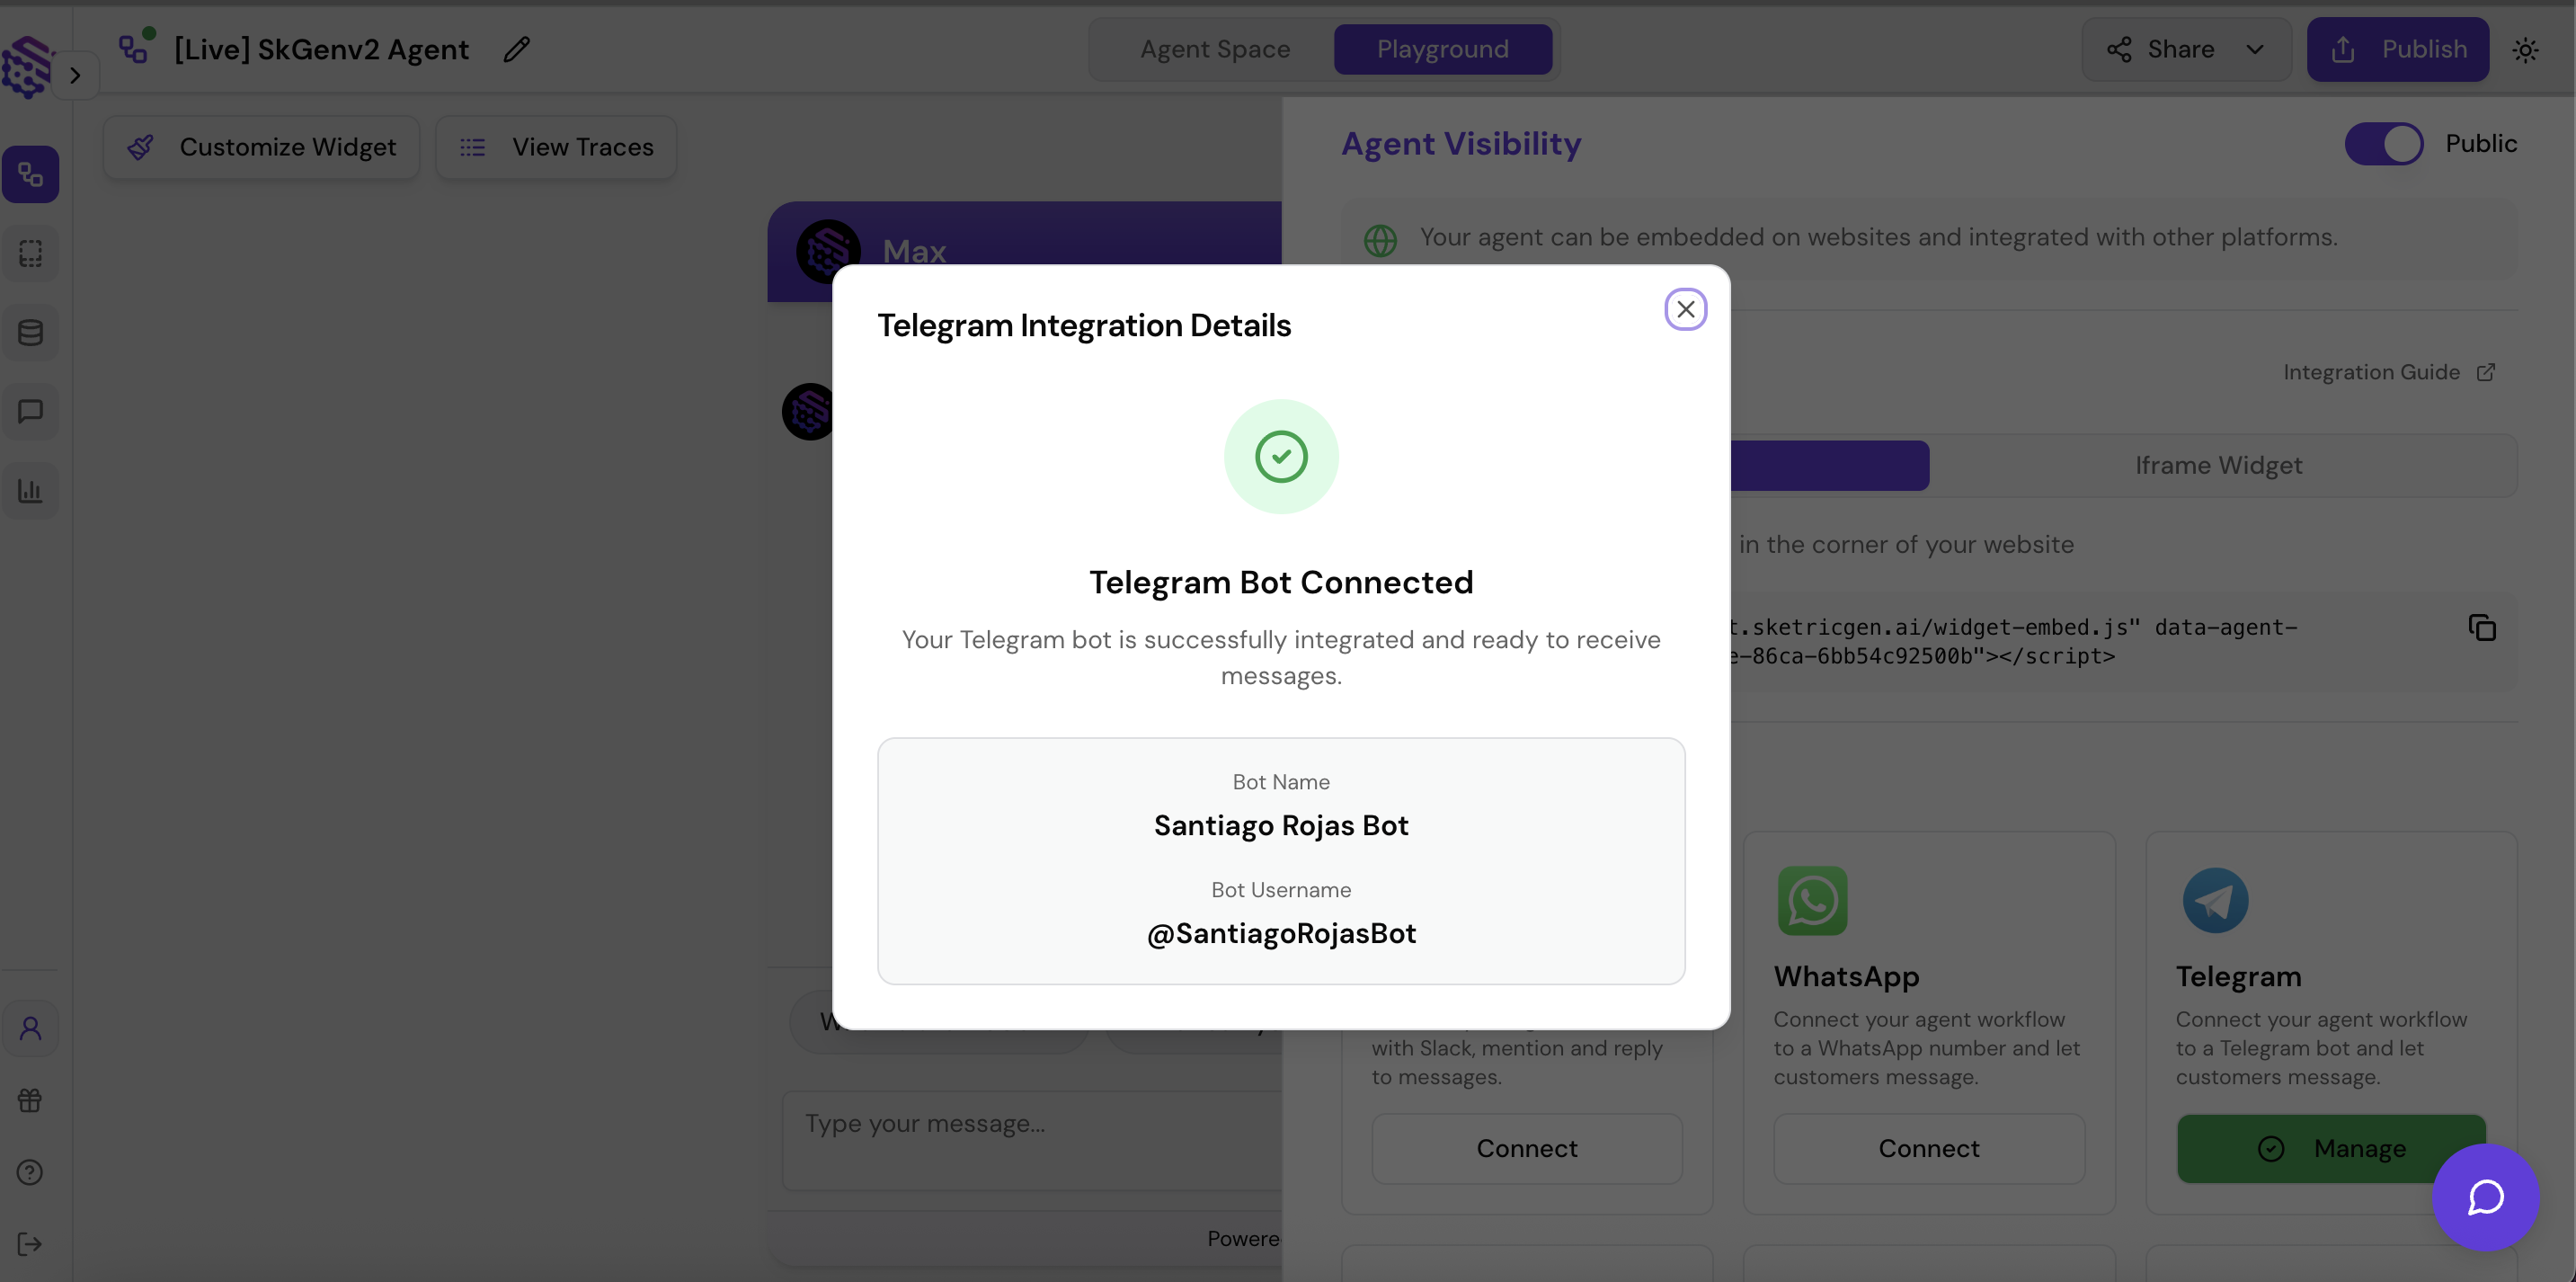
 3. Your Connect button will change to Manage and you will see your bot details
 ## **Success**
**Congratulations!** Your Telegram bot is now successfully connected to **SketricGen**.
Your Brand Agent will now respond when your Telegram bot receives a query.
## **Success**
**Congratulations!** Your Telegram bot is now successfully connected to **SketricGen**.
Your Brand Agent will now respond when your Telegram bot receives a query.